“Do everything you do for the glory of the One who made you because he made you to do every little thing that you do to bring a smile to his face and tell the story of Grace with every move that you make in every little thing you do.”
2014 is over. What?! So crazy all that has happened in 2014, most of which I already talked about in this post, so I’m going to instead focus on what I hope to do in 2015.
Cosplayers always have a list of characters they hope to cosplay. And it’s usually a long list. I am no exception to this stereotype. I remember when I first started learning about cosplay I thought it was crazy how people would make 10-20 cosplays over the span of a couple of years. Then I actually made my first cosplay and I totally understand. Once you see what you can do, you just want to keep going. It’s an obsession in its own right.
Image creds to Jon Fiedler
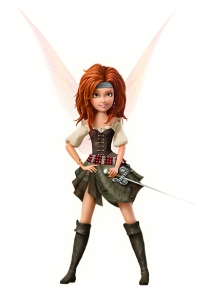
One of my main character goals for 2015 are fairies. Two fairies to be specific. Tinker Bell and Zarina, aka the Pirate Fairy. I have wanted to cosplay Tink for a longggg time. Back when I was five or six, I was Tinker Bell in one of my ballet recitals, and I was on cloud nine the whole time. There’s just something about Tink I’ve always been drawn to. I’m hoping the shape of my dress will be close to the one pictured on the right. I believe it is Tink’s dress in a parade in Tokyo Disney Sea, but I’m not sure. I just like the overall shape of it better than her dress here in Disney World.
Once I saw The Pirate Fairy earlier this year, I knew I wanted to do Zarina too. The design of her outfit is just so awesome! Periwinkle from Secret of the Wings is in my mind for sometime down the road, but she’s not immediate like Tink and Zarina. I finally purchased the wings of my dreams a few weeks ago, so the door to the fairy cosplay world is wide open.
I think one of my favorite Disney movies is Wreck It Ralph. Vanellope is just amazing. Earlier this year I lost my voice, and as it was on its way out, I got this squeak like Vanellope. And it was amazing. Vanellope is one of those characters that isn’t super high on my list, but she’s one that whenever I see mint hoodies I always think about her. So maybeee this year if the mood strikes me I’ll do her, but nothing is definite.
I really really want to make a Flower Maiden dress like the Flower Maidens in the Disney World parade, Festival of Fantasy. I am obsessed with these dresses. Anyone that knows me knows about my obsession and rolls their eyes. Yes, the dresses are all the colors of the rainbow. Yes, they’re poofy and slightly gaudy, but THEY’RE FLUFFY AND COLORFUL AND TWIRLY AND I MUST HAVE ONE. The bad thing is, it’s a huge undertaking. So much fabricccc. So I don’t know if it will happen this year, but I certainly hope it will and will try my best.
VERY HIGH on the priority list are Jedi Robes. I will turn 18 this year, which is the age for acceptance into the Rebel Legion: a Star Wars costuming organization. I have been waiting and waiting to be old enough to join, however I still don’t have a costume to join with. I hope to one day add Ahsoka and cosplay her for events with them, however I don’t think she will be finished by my birthday, which is when I would really like to join. I have the proper hairstyle for Siri Tachi, a blonde Jedi from a few different Star Wars novels, so I’m using her outfits as my inspiration. She has a couple of different robe colors and styles from book covers, so there are a few different options with her robes. I have enough skills now that Jedi robes should be a breeze, I just have to, you know, actually make them.
Speaking of Ahsoka, I need to kick her into high gear. I finally have funding and knowledge under my belt that I need in order to make her properly, I just have to, like the Jedi robes, actually make her. I’m wanting to do a latex headpiece, so I know that is going to take a lot of time to do. And frankly, even though I know how to do it, the thought of all the sculpting and mold-making really scares me. So we’ll see what happens with her this coming year. Maybe I’ll at least get the fabric bits done!
So I think that’s about it! My cosplay “list” is wayyy longer than what is listed here. I have so many cosplay dreams it’s crazy. I can’t wait to see what 2015 holds!
Merida’s hair. The nemesis of cosplayers everywhere.
I mentioned in my final Merida post that I was still looking for a wig for her. And I kept looking for about another month and a half.
People I asked where they bought their wigs generally couldn’t remember or would give me a generic answer such as “Oh it’s just a cheap wig off Etsy.” Unfortunately, there are a bunch of cheap Merida wigs on Etsy. Many of them are from China, so I didn’t really want to risk buying yet another bad wig I would have to pay return shipping on overseas.
She’s the best. <3
Finally, I found a girl on Instagram who bought her wig from Wig Secret. I liked the way it looked, I could see a real picture, and I knew that she liked it. I had looked at this particular wig before, but I just didn’t know if it was exactly what I wanted or not. I liked the way it looked on her, and I was tired of looking and didn’t want to take a risk.
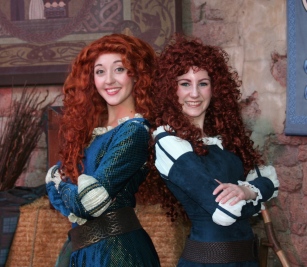
I ordered from Wig Secret’s website, not their eBay. I forget the exact math, but it was cheaper to order directly from their site versus their eBay store. I purchased their Lioness wig in Fox Red. It has the length and fullness that Merida needs, but it’s more of a red color than orange, as you can see in the picture with Merida in Disney World. Merida’s hair is usually a little curlier on the top, but her mother had helped her wash it recently, so the curl was relaxed on a little bit. I was blessed to be able to attend Mickey’s Not So Scary Halloween Party back in October after my birthday, so I chose to attend as Merida. More on that in a later post.
Hope this helps anyone looking for a Merida wig! Merida is my favorite character to be. She’s just so fun, and the accent is amazing.
My apologies for not posting for a few MONTHS! Yikes! School and business ownership have completely taken over my life.
Yes, you heard me. Business ownership. Yes, I’m crazy. I’ve mentioned on here before that I have thought about using my costumes to start a princess party business, and me and my long time best friend finally did it. We officially opened for bookings on May 5th of this year (Revenge of the Fifth for all my Star Wars fans), and finally had our first party in July with the addition of our Snow Sister characters.
It’s a bit surreal having people coming to you asking to hire them when you’re not even out of high school. Or writing a paycheck to your brother. Or just attending business meetings at your county Town Hall. It’s awesome, but sometimes really odd to think about.
So here’s a bit of an overview of what all has been going on since I last posted:
In June I had the wonderful privilege of attending Star Wars Weekends in Disney World to meet up with some of my AMAZING friends I have met through Instagram. I will have a big post about that sometime soon.
I also found a wig for Merida, thus completing her outfit. I also finished Ariel’s “Kiss the Girl” dress and Elsa/the Snow Queen, bringing my costume count to five (including Rarity).
After the addition of our Snow Sisters, our business promptly took off, eliminating any weekend time I previously had for sewing. I haven’t worked on a major project since Elsa in July, and I miss sewing terribly. I have a number of projects planned for my Christmas break that I’m super excited about.
My mom also surprised me by taking me and my business partner/best friend to Disney for my birthday at the beginning of October for Mickey’s Not So Scary Halloween Party. It was so amazing, so I’ll have a big post on that in the future too.
I’ve been catching up on my blogging and hope to never leave you hanging with an extremely long gap again. Here’s a glimpse of some things coming in the next few weeks:
My final Merida wig and where to purchase your own
Merida cosplay pictures
A detailed walkthrough of my Ariel costume and pictures
A detailed walkthrough of my Elsa/Snow Queen costume and pictures
Background and information guide on grommets and eyelets
My adventures at Star Wars Weekends and Mickey’s Not So Scary Halloween Party
My future Disney plans
My goal is to have a new post every 1-2 weeks. We’ll see how long it lasts, but I’m stocking up on posts now so that hopefully I can stay more consistent.
Thanks for hanging in there!
Taria
“A dream doesn’t become reality through magic; it takes sweat, determination and hard work.”
This is the third and final post on my Merida dress. Part one can be found here and part two is here.
As the title says, this post is my third post about my Merida cosplay. I finished Merida back in the beginning of April but didn’t get a chance to do a final progress post about her. As of this moment, I am still searching for the perfect wig for her (more on that later), but I have a few pictures of the finished dress.
I left off in my last post after I finished making the blue bands that go over the cream parts of Merida’s sleeves (you can read about that in my Merida post #2). After I had all 14 bands, I pinned them on the sleeve portions to figure out where to sew them down. Three bands were pinned on each of the top sections and four on each of the elbow sections. I pinned the pieces, held the piece on my arm where it would end up, and looked in the mirror to see if I had placed them correctly. After several adjustments, I finally had them right and sewed them down individually so they wouldn’t shift when I sewed the sleeves together.
After that was all finished, I assembled the sleeve pieces, but I didn’t sew it into a tube shape quite yet. I knew that the ruffle around the hand portion of the sleeve would be a lot easier to work with if I attached it before sewing the tube shape. To start off, I took two long strips of chiffon about 2 inches wide, folded them each in half, and then gathered one side with two long, straight stitches. Then, I cut two 2 1/2″ strips of my blue fabric that were the width of the bottom of the sleeves.
With the sleeve laying right side up, I laid the piece of chiffon upside down on top of the right side of the sleeve, so pretty side of the chiffon pointed toward the top of the sleeve and the raw edges aligned with the raw edges of the sleeve. Then, I put the 2 1/2 inch strip of blue fabric on top of that, WRONG SIDE UP. The picture shows the sleeve before I put the blue strip on top of the chiffon, but this should at least give you the right idea.
After the chiffon and two layers of blue were sewn together, I flipped it all around so that the chiffon now pointed in the right direction and the blue strip that was facing wrong side out was now right side out on the back of the sleeve. After that was all finished, then I sewed the sleeves together to make the tube shape and then attached them to the dress.
The last major hurtle in my way with this dress was the neckline. To finish the neckline, I knew I needed a facing. For those that don’t know (it took me a few months cosplaying to figure it out), a facing is where you cut a piece of fabric that has exactly the same curve as your neckline. You sew it to the neckline with the right sides together so that when you flip it right sides out, you have a finished neckline. I’m not going to get into how to put in a facing here, but a google search of “Make a neckline facing” brings up tons of great sewing blogs that can help you.
My neckline by this point didn’t follow the pattern neckline because I had raised and cut and altered it so much, so I knew I would need to trace my neckline to make my own facing pattern. I traced my neckline onto freezer paper (any paper works, I just have a huge roll of freezer paper) with the v-slit and made and installed the neckline facing and under-stitched the facing (again, Google can explain), thus finishing the edge of the neckline.
I knew that my method of adding the ruffle that I used on the sleeves wouldn’t work on the neckline because of the v, so I just finished the edge first then added the ruffle afterward. I gathered yet another long piece of chiffon along with a rectangle piece that I used under the v. I sewed the gathered rectangle piece to a piece of my cream cotton so that all the gathers would stay in place, I then sewed the rectangle to the middle of the long gathered strip so that they were connected on the inside. I pinned the gathered chiffon to the neckline and topstitched it on, sewing all the way through the neckline so that stitching showed on the outside. No one notices anyway. I did have to go back and open out the facing and sew the chiffon down one more time to just the facing (no stitching on the outside of the dress) because the chiffon kept wanting to flip outward at my shoulders.
Two of those blue threads are the gathering threads, one is the topstitching thread, and the one closest to the bottom is the stitch that holds the ruffle down to the facing. My serger didn’t like that cotton rectangle once it was sewn to the dress, so the inside looks uglyyy.
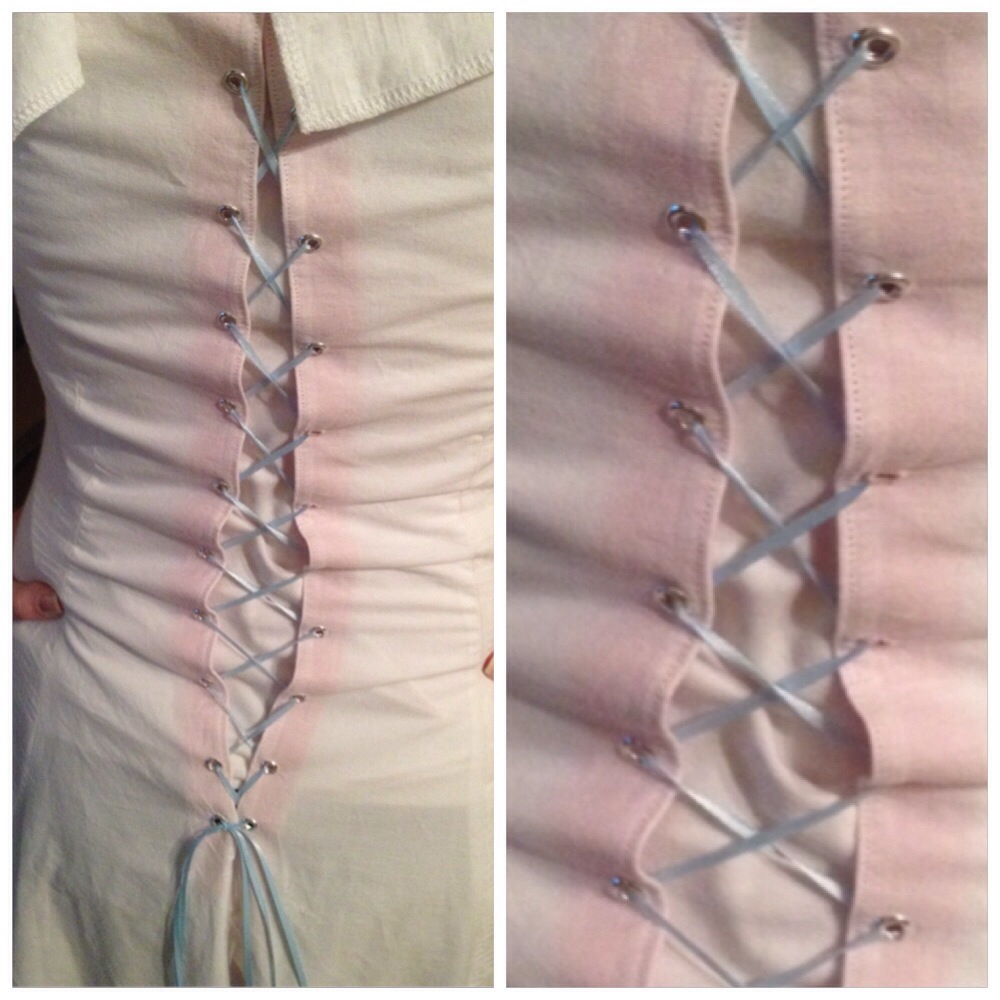
While I was working on the sleeves, I began the process of slowly hand sewing around holes that I punched in the back of the dress to lace the dress. I didn’t have any good grommets on hand at the time, but I still wanted to have the dress lace up, so I decided to hand sew around the holes. I had some eyelet pliers that were terrible at putting in eyelets, but the punch function on them worked pretty well, so I punched the holes and then hand sewed around them. It was actually really relaxing and fun to do while watching a movie. I miss hand sewing (until I do a cosplay that requires a ton of it and I’ll never want to hand sew again *ahem* Elsa *ahem*). In all, there were 40 hand sewn holes, but I’m extremely happy with the way they came out. A much more natural look than if I had used grommets.
I hand sewed in a modesty pannel into the back of the dress, which is essentially a rectangle sewn in behind the laces. Super easy, cut 2 rectangles, sew around them right sides together leaving a little hole, flip right side out, and then I topstitched around the whole thing and hand sewed it behind the laces on one side, the other side is loose.
And that was it for Merida…except her wig, which I am still struggling with. I tried twice to get New Look’s Diana 3 in Fire Red, but both times it was out of stock. So then I tried a wig from Amazon, but the original picture online was very over-exposed, so the wig was too dark. So I’m back to square one and after spending $15 shipping my dark wig back to the UK, I’m scared to buy another one. Grr.
So that’s all for Merida for now! I’ll be sure to post after I get my wig and have a photoshoot. In the meantime, here’s a picture of the full dress from the day I gave my presentation on the historical accuracy of Brave.
Thanks for reading!
Taria
“The only place success comes before work is in the dictionary.”
Well my promise to post about 2 weekends ago didn’t go through as planned. Sorry about that…
Just as a notice, this post is longer than what I usually post. I’ve been trying to figure out how to improve my blog, and I have found I really enjoy reading cosplay blogs that really go into detail about how they make their costumes, so I’ve decided to try that here! Let me know in the comments if you like the detail or if you’d rather me stick to a shorter cosplay overview. I will continue to refine my blogging style over time as I gain experience, same with cosplay. :)
I spent several hours two weekends ago trying to drape a blouse pattern on my dress form for my secret Disney cosplay. The draping attempt was kinda unsuccessful. Pattern draping is where you take a square piece of fabric and pin it at certain places on a dress form to create a pattern. This involves creating the darts, side seams, arm holes, and neckline. Sooo much more difficult than it looks! Needless to say I didn’t post because I didn’t really have anything to show. I got really frustrated, so I kinda shoved it aside. Needless to say I bought a blouse pattern during a $1 pattern sale, so I’ve kinda ditched the draping thing for now.
This past weekend was extremely productive and made me really happy. Love it when things go well in the cosplay world. ;) I started on yet another Disney cosplay, though not the secret one I mentioned 2 weeks ago! Instead of holding you in suspense, I will go ahead and share who it is.
Merida from Disney’s Brave.
I just found out two weeks ago that I am going to be doing a research paper for my history class. I decided to research the dress and life of Medieval ladies. That topic evolved into The Historical Accuracy of Brave, which I will post here when it’s finished if y’all are interested. :) I am making Merida’s dress to go with my presentation. Her dress is pretty historically accurate, along with the majority of things seen in the film.
So! Merida progress. As always, I started by making a prototype out of bed sheets. My mom gave me a ton of old sheets during the move, so I have loads of them. Even when working with patterns, I like to make sure that all of the little details will work out right in my final product. Muslin is a good cheap alternative if you don’t have a big supply of sheets.
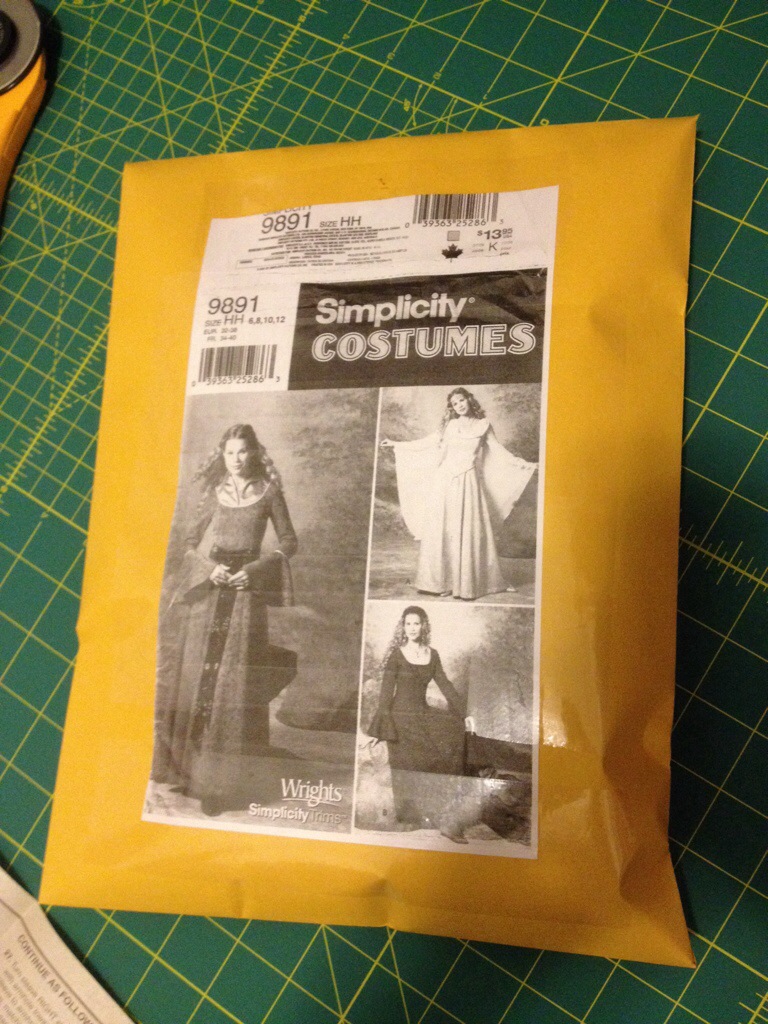
Here’s the pattern I’m using. On an online sewing blog, I read about a lady who copies the front of the pattern envelope and then tapes the copied picture to a bigger manilla envelope so that you can keep all the pattern pieces and any copies you make inside the bag all together. I traced the entire dress pattern onto freezer paper. Freezer paper comes on a roll like aluminum foil and it’s basically a big roll of white paper with a plastic backing. You can use parchment paper to trace your patterns onto as well, and that would probably even be better because you can buy it pretty wide. I use freezer paper because I bought a large roll of it for stenciling, so I have tons of the stuff to use up. Tracing the pattern makes it where if I need to make modifications, I haven’t cut up my original pattern.
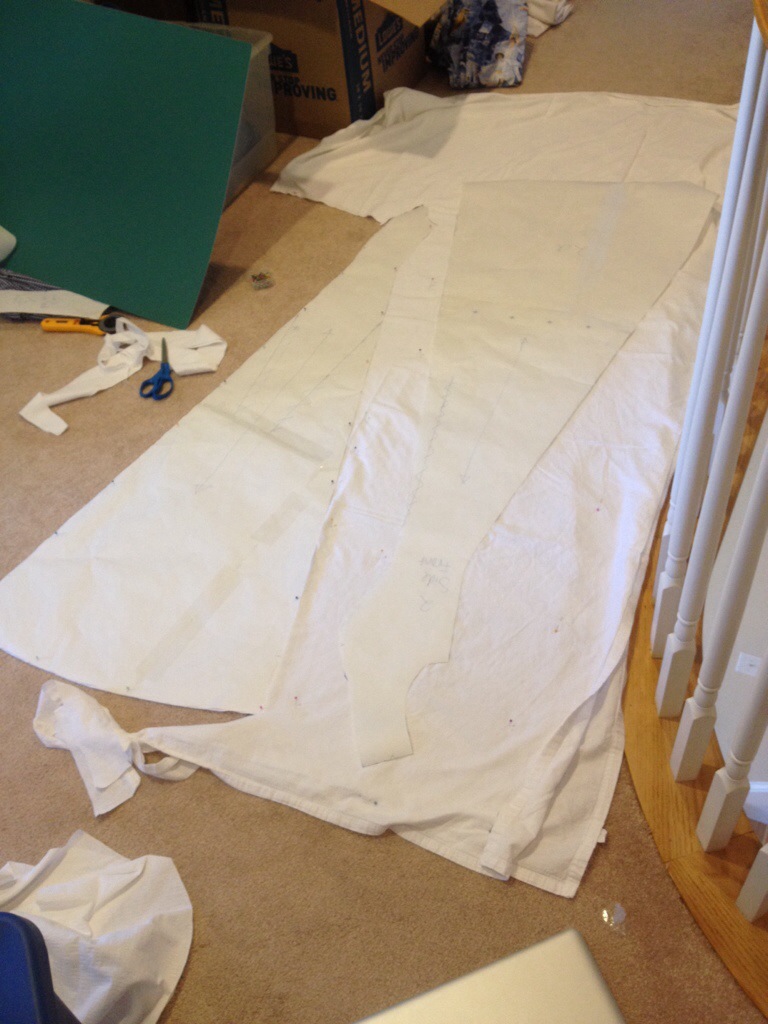
You can see all the pins that are holding the patterns and fabric down to the carpet while I’m cutting around the pattern.
When I cut fabric out, I will usually use my rotary cutter and mat if it’s small enough like a bodice or sleeve. For the dress, I had to lay it out on the floor. Something I do when I cut things out on the floor: if you have carpet, lay your fabric down and pin in straight to the carpet. Stretch the fabric all out flat and put pins all around, then put the pattern on top where it needs to go and put your straight pins straight through the pattern and fabric and also down into the carpet. It doesn’t harm the carpet one bit and it keeps everything from sliding around, not to mention it’s a lot faster than sliding the pins down and back up through the fabric alone and hoping you don’t catch the top of the carpet.
As usual, I found something that needs altering from my prototype. In this instance, the neckline on the pattern is too low cut for Merida. Glad I caught the problem now rather than later! The neckline looks weird in this picture because the strip of fabric on the outside needed to be folded and sewn to the inside, which I hadn’t done yet. When I traced my pattern onto the freezer paper, I also added a good 8 inches or so of length to each piece just to make sure the dress would be long enough. That was probably a little too much, but it allowed me to hem the prototype with a train in the back, which is super fun to walk around in.
The eyelets aren’t crooked, it just looks that way. When I do the real dress, There will be a lot more lacing holes, so the puckering will go away.
I tried out a new way of putting eyelets into the back of a dress. It’s probably very unconventional, but it works for me. That’s what I love about sewing. If you can get it to do what you want, it doesn’t matter how you do it.
I didn’t feel like using any of my white canvas, so I used red canvas in the back of the dress since it’s just a prototype. I sewed up the back of the dress like I was going to put a zipper in. I folded back and ironed the remaining opening and then stitched strips of my canvas into the folds. I put the eyelets through the fabric and canvas, which made a thicker surface for the eyelets to hold on to so the cotton doesn’t pull as much. It actually worked really well! I either have cheap eyelets or junky eyelet pliers because only 1 in about 20 eyelets actually goes in correctly. I had to cut two eyelets off my pliers while I was trying to put them in because they got stuck on the pliers. Super frustrating. I ran out of eyelets while doing the back of the dress, so hopefully a different brand of eyelets will work better.
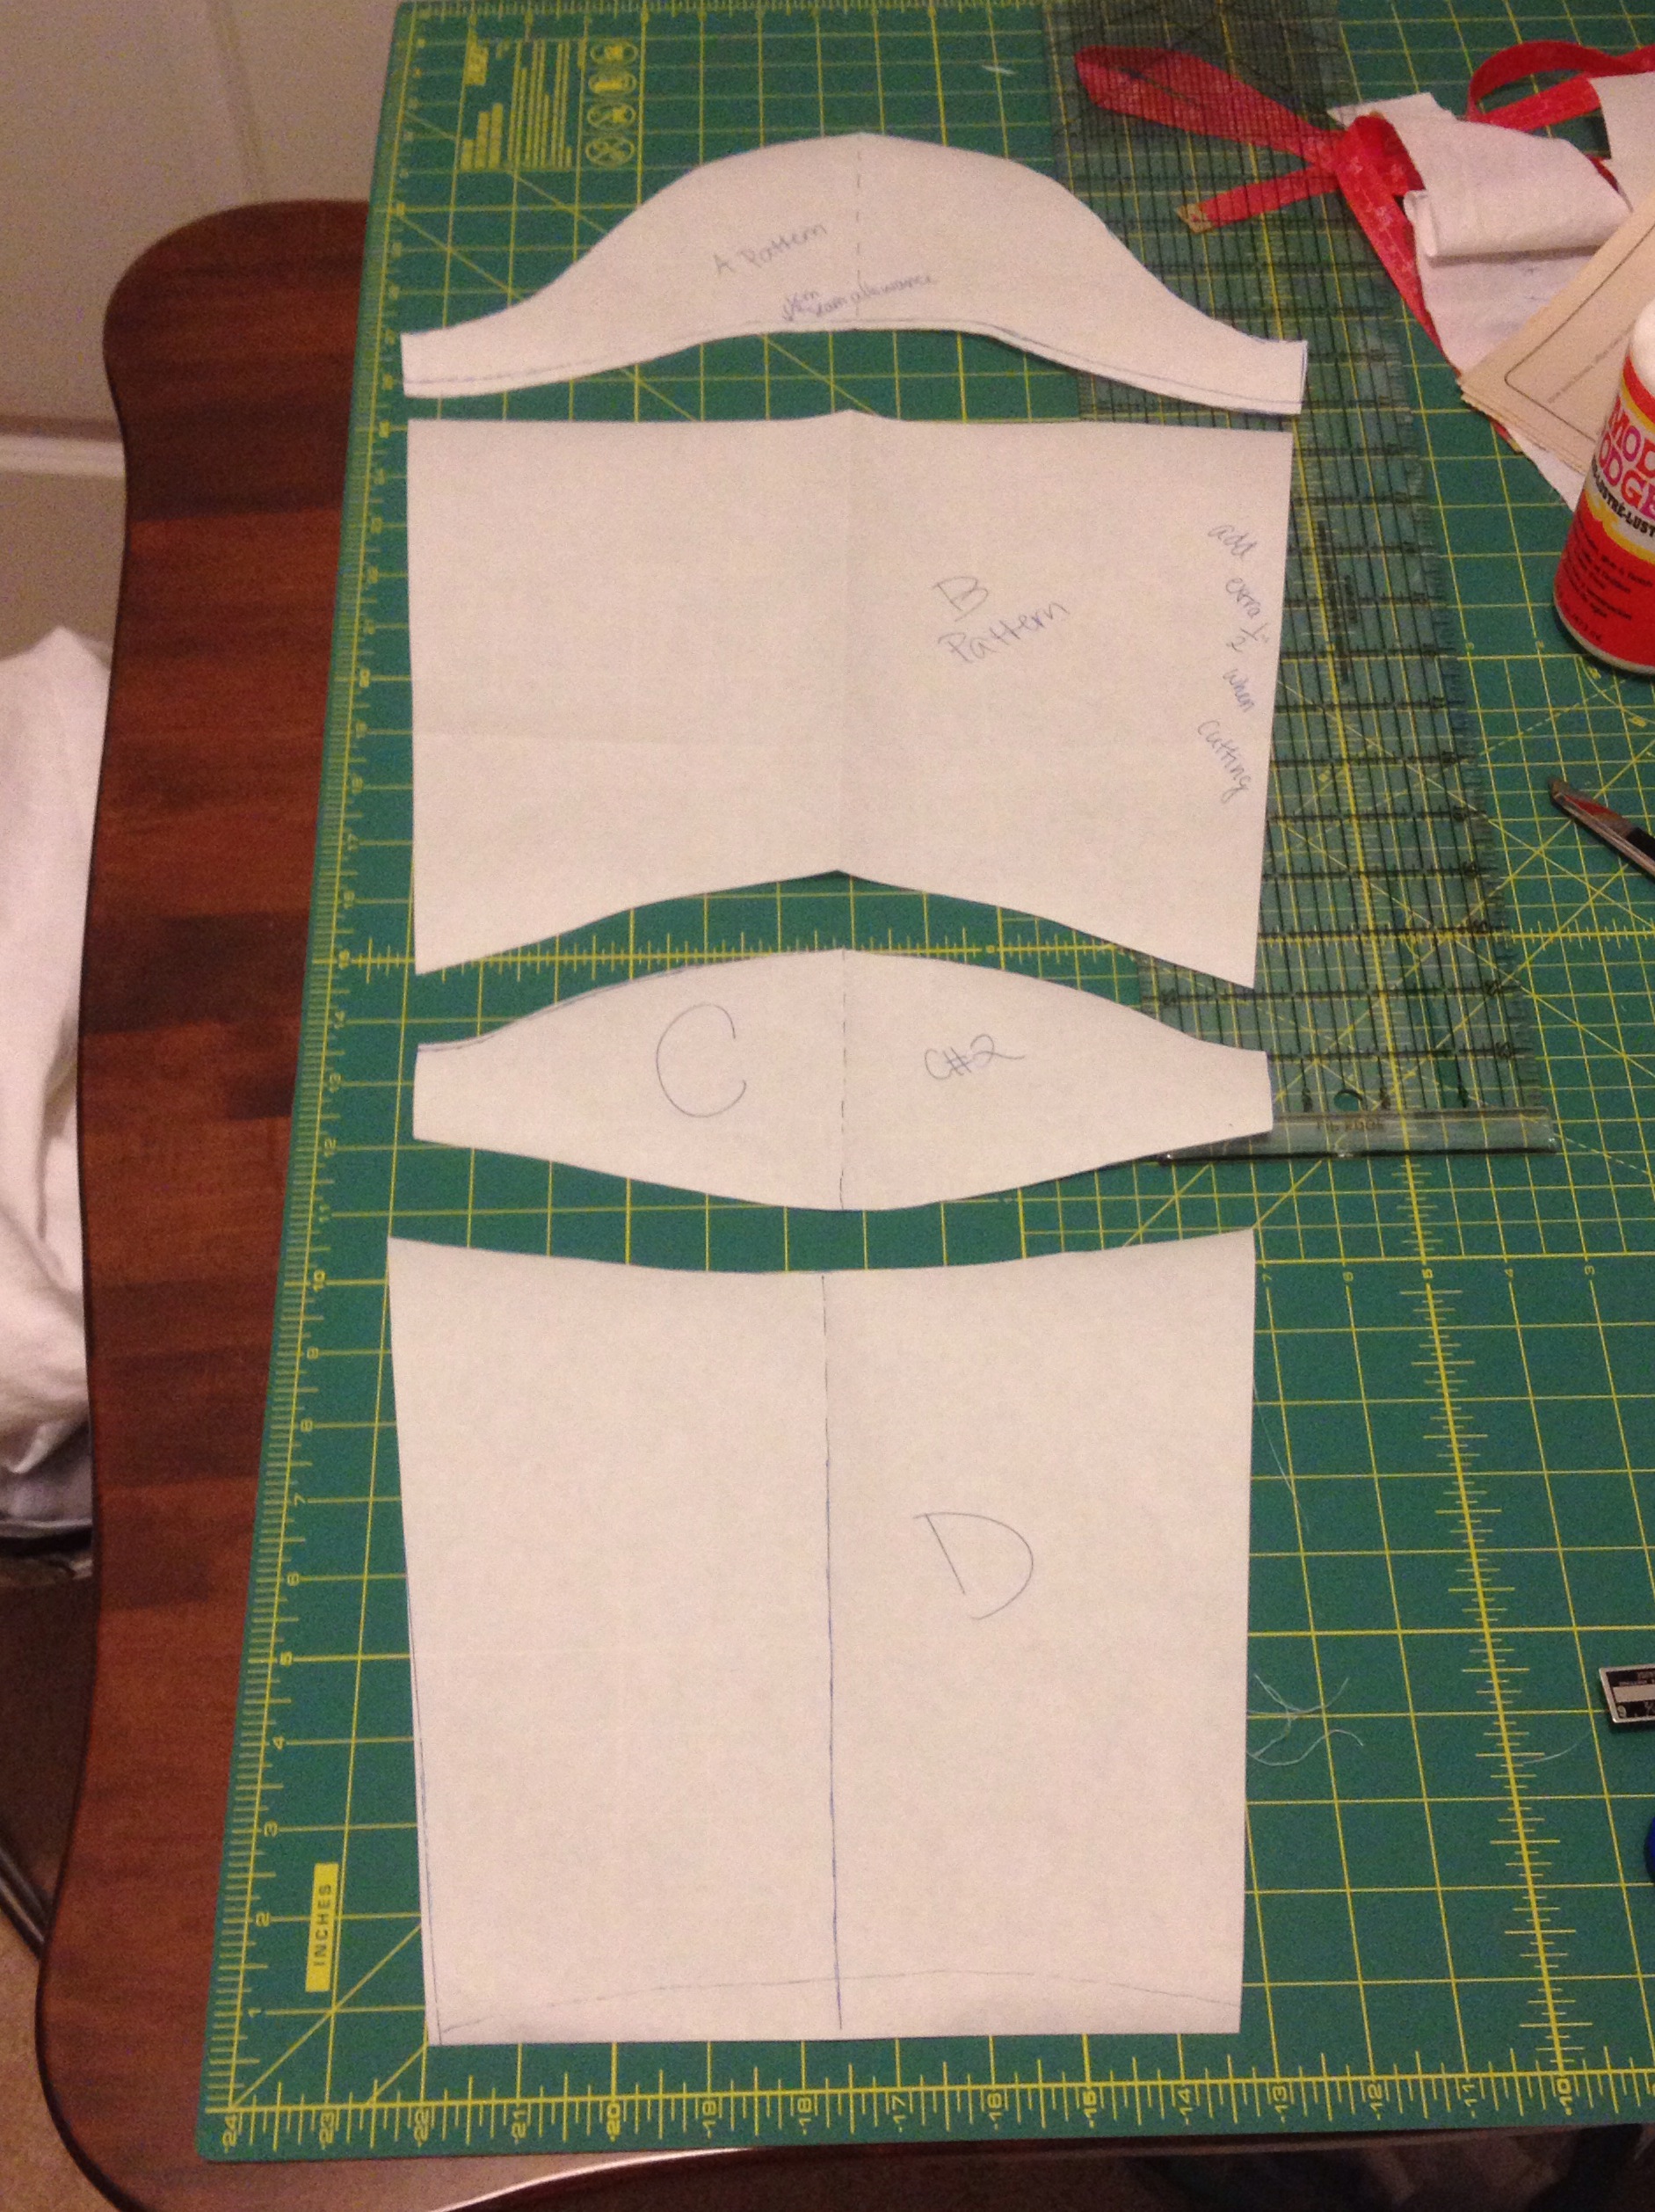
I’ve spent more hours than I can count trying to draft a pattern for Merida’s sleeves. Her sleeves are made up of 4 parts: 2 the same fabric as her dress, and two of a light cream colored fabric. In the movie, Merida wears a full under tunic called a kirtle that was most likely made of linen, and that is the cream that sticks through the slit sleeves and neck of her overdress. For comfort, look, and money purposes, I’m making a “mock underdress.” I’ve found that mock sleeves tend to look better as far as Merida cosplays are concerned because they really hold the poof shape.
When I started with the sleeves, I turned to Angela Clayton’s Cosplay and Costumery blog. She is an amazing cosplayer who cosplayed Merida a few months ago. She posted her measurements and outline for her sleeves on her blog, so I started out with those and drew them out on my freezer paper. She had a few weird measurements that give her sleeves a particular shape, however I couldn’t make some of those measurements work. I did use her measurements and outline as a basic guide and they helped a lot when figuring out my pattern!
After I traced out the design on freezer paper and cut it out, I cut out the four pieces on some scrap fabric and sewed them all together temporarily with a long straight stitch on my machine so that it would be easy to take apart. I then sewed the temporary sleeve into the dress and figured out what modifications I needed to make. There were a bunch! I used a removable fabric marker to mark where I wanted certain parts to come on my arm while I was wearing the dress. Then when I took it all off, I knew how to fix what needed to be fixed.
The purple marks on the right show where the seam lines are in the sleeve since you can’t really see them in the picture alone.
I started by fixing the shape under the arm at the top of the sleeve. I learned why the curved shape of sleeves is important. Sleeve patterns have a particular curved shape that allows for there not be be a bunch of fabric under your arm. Think of it this way: if you sew a plain tube of fabric to the arm hole of a dress or shirt, all the fabric will be stretched out when your arm is stretched straight out to the side. However, when you put your arm by your side, you’re going to have fabric bunched up under your arm. To fix that, you curve the top of the sleeve.
Pattern sleeve on the top, my failed attempt on the bottom.
Instead of trying to wing it, Idecided to just pull out the sleeve from my dress pattern and trace it to use. I traced it onto my freezer paper and cut it out of some more scrap fabric. I temporarily sewed it into the dress and then used the fabric marker to mark where I wanted to cut it to be Merida length. The picture to the right shows what I ended up with. The new pattern with help from the dress pattern is on the top, my junky first attempt is on the bottom. The bigger curve eliminates the puckering under the arm.
Edit!!!While the above information is true, I wish I had stuck to my old pattern, and here’s why.
If you look closely at the Merida in the Disney Parks, you can see that she has a bunch of extra material under her arms. This is important because…you need it to raise your arms up. While my sleeves on the final dress work, I have severely restricted arm movement. In conclusion, I’m going to be remaking my sleeves to have much less of a curve to them. In this instance, the extra material is ok. So don’t use a super curved pattern because it will restrict your arms.
So, I had a top sleeve pattern, now I needed to fix the rest of the sleeve. I started by evening up some of the uneven measurements from Angela’s pattern that didn’t work for me. I made the middle sleeve poof centered on my elbow and fixed the pieces above and below it accordingly. This took the longest time of anything, I lost count of the hours and Clone Wars episodes I watched while refining this part. Cut fabric, sew it together, try it on, mark it, rip it all apart, and do it all again until you get it right. There is always one “doom” component to every costume it seems. Before it was the Alice Petticoat of Doom, now it’s the Merida Sleeves of Doom, though the petticoat took much much longer.
So I finally got a pattern! Whoo! The four parts turned out like this:
Then I decided to experiment with the poof part of the sleeves.
I’m using Angela’s method of poof which involves gathering a layer of chiffon and sewing it to a flat piece of fabric. I didn’t cut a wide enough piece of chiffon, so that’s why it’s not as gathered toward the ends of the piece. When it was all gathered, pinned, and sewn down, the poof turned out like this:
It turned out so pretty I just wanted to stare at it and feel all the ruffles! You would too if you’d been sewing and seam ripping the same pattern over and over for the past few days . . .
I added the same gathered chiffon to the elbow section of the sleeve and sewed it all together. There are little rectangles that go over the gathered sections, but I didn’t feel like adding them at this point. I was just ready to have a sleeve!
So finally, all assembled, this is what my sleeve looked like! Yes, it has pattern markings in permanent pen on it, but I was too sick of these sleeves to care. I didn’t feel like cutting out another piece. Lazy, I know, I know. But it’s a prototype, so whatever. :)
And the full dress as it stands!
This picture was taken at night right after I finished the sleeve, so it’s a horrible picture, I know. But it gets the idea across for now. I’m also wearing a long sleeve white shirt because the neckline is much too low for my comfort. I went out and grabbed my Dad’s bow to take the picture with. My bow is white, so I figured his would look better. :)
I still need to buy real fabric for Merida, but I decided to do her so quickly, I haven’t really had time to research and look for what kind of fabric I want. I’m thinking velveteen or possibly wool suiting, but I’m not sure at this point. I will probably switch over to my secret cosplay for a few days until I get my real fabric since this is all I can really do to Merida at this point.
That’s all I have for now! What do you think of this blog style? Like it? Too long? Too detailed? Not enough? Let me know via social media or the comments what you think! Writing this post has given me a feel for some things I wish I had taken pictures of, so I will remember to take more pictures as the dress progresses.
Hope you enjoyed it!
May the Lord as the Force Be With You!
Taria
“Do everything you do for the glory of the One who made you because he made you to do every little thing that you do to bring a smile to his face and tell the story of Grace with every move that you make in every little thing you do.”
Wow! What a busy past few weeks! I hope you all had a wonderful Christmas and New Year!
Where have I been? Well we just finished moving to a rental house! I have a huge closet that is my new cosplay space for the time that we’re here. I have been busy packing and unpacking these past few weeks, so I haven’t been able to sew much!
That being said, I have made 2 things since I last posted!
Yes, that is Clone Trooper bedsheet fabric. :)
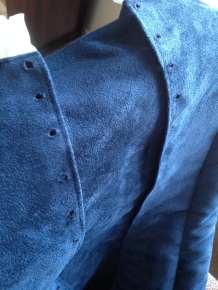
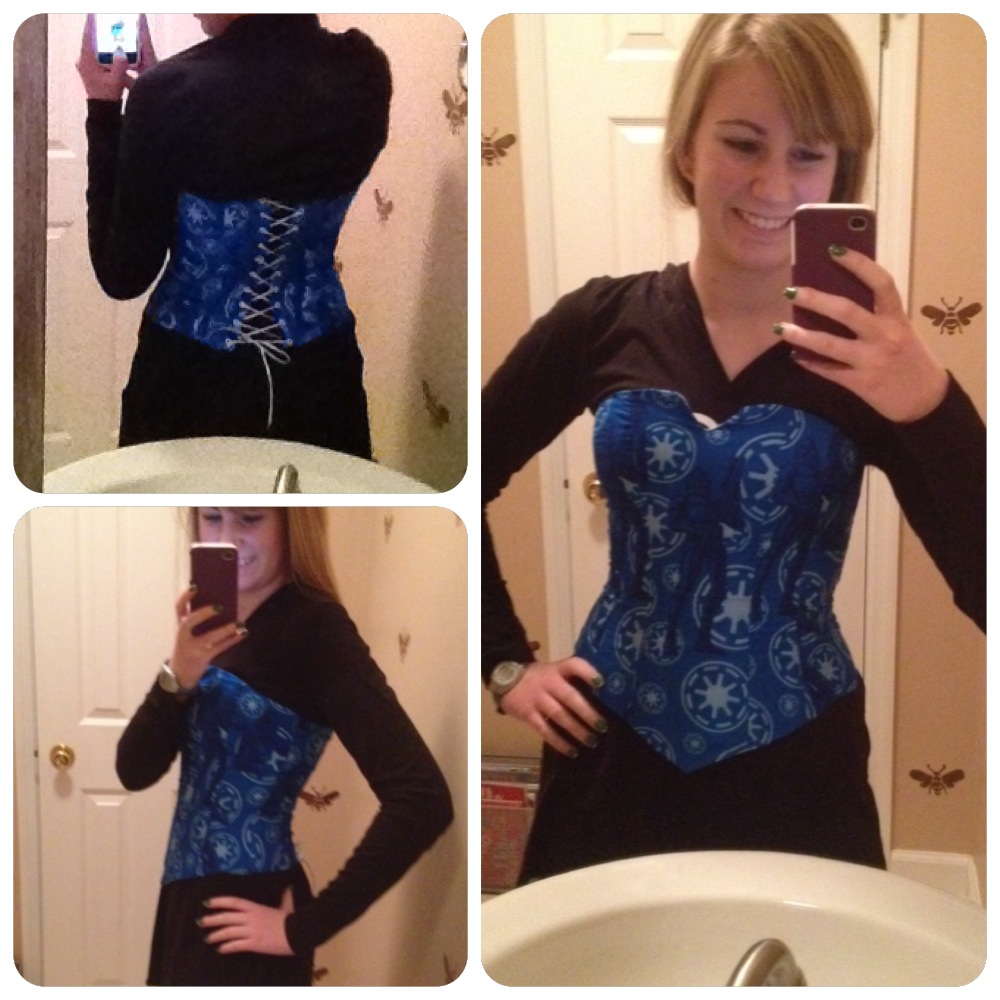
The first was my first corset that I started making during the beginning of my Christmas break. I used a purchased pattern, but I took out the side zipper and changed it to eyelets in the back so that it laces. I used zip ties for boning and it worked pretty well! I love the way the corset feels when I wear it. The pattern was good for me to learn basic corset construction so I will know how to draft my own patterns for things in the future. :)
Who could this be for? ;)
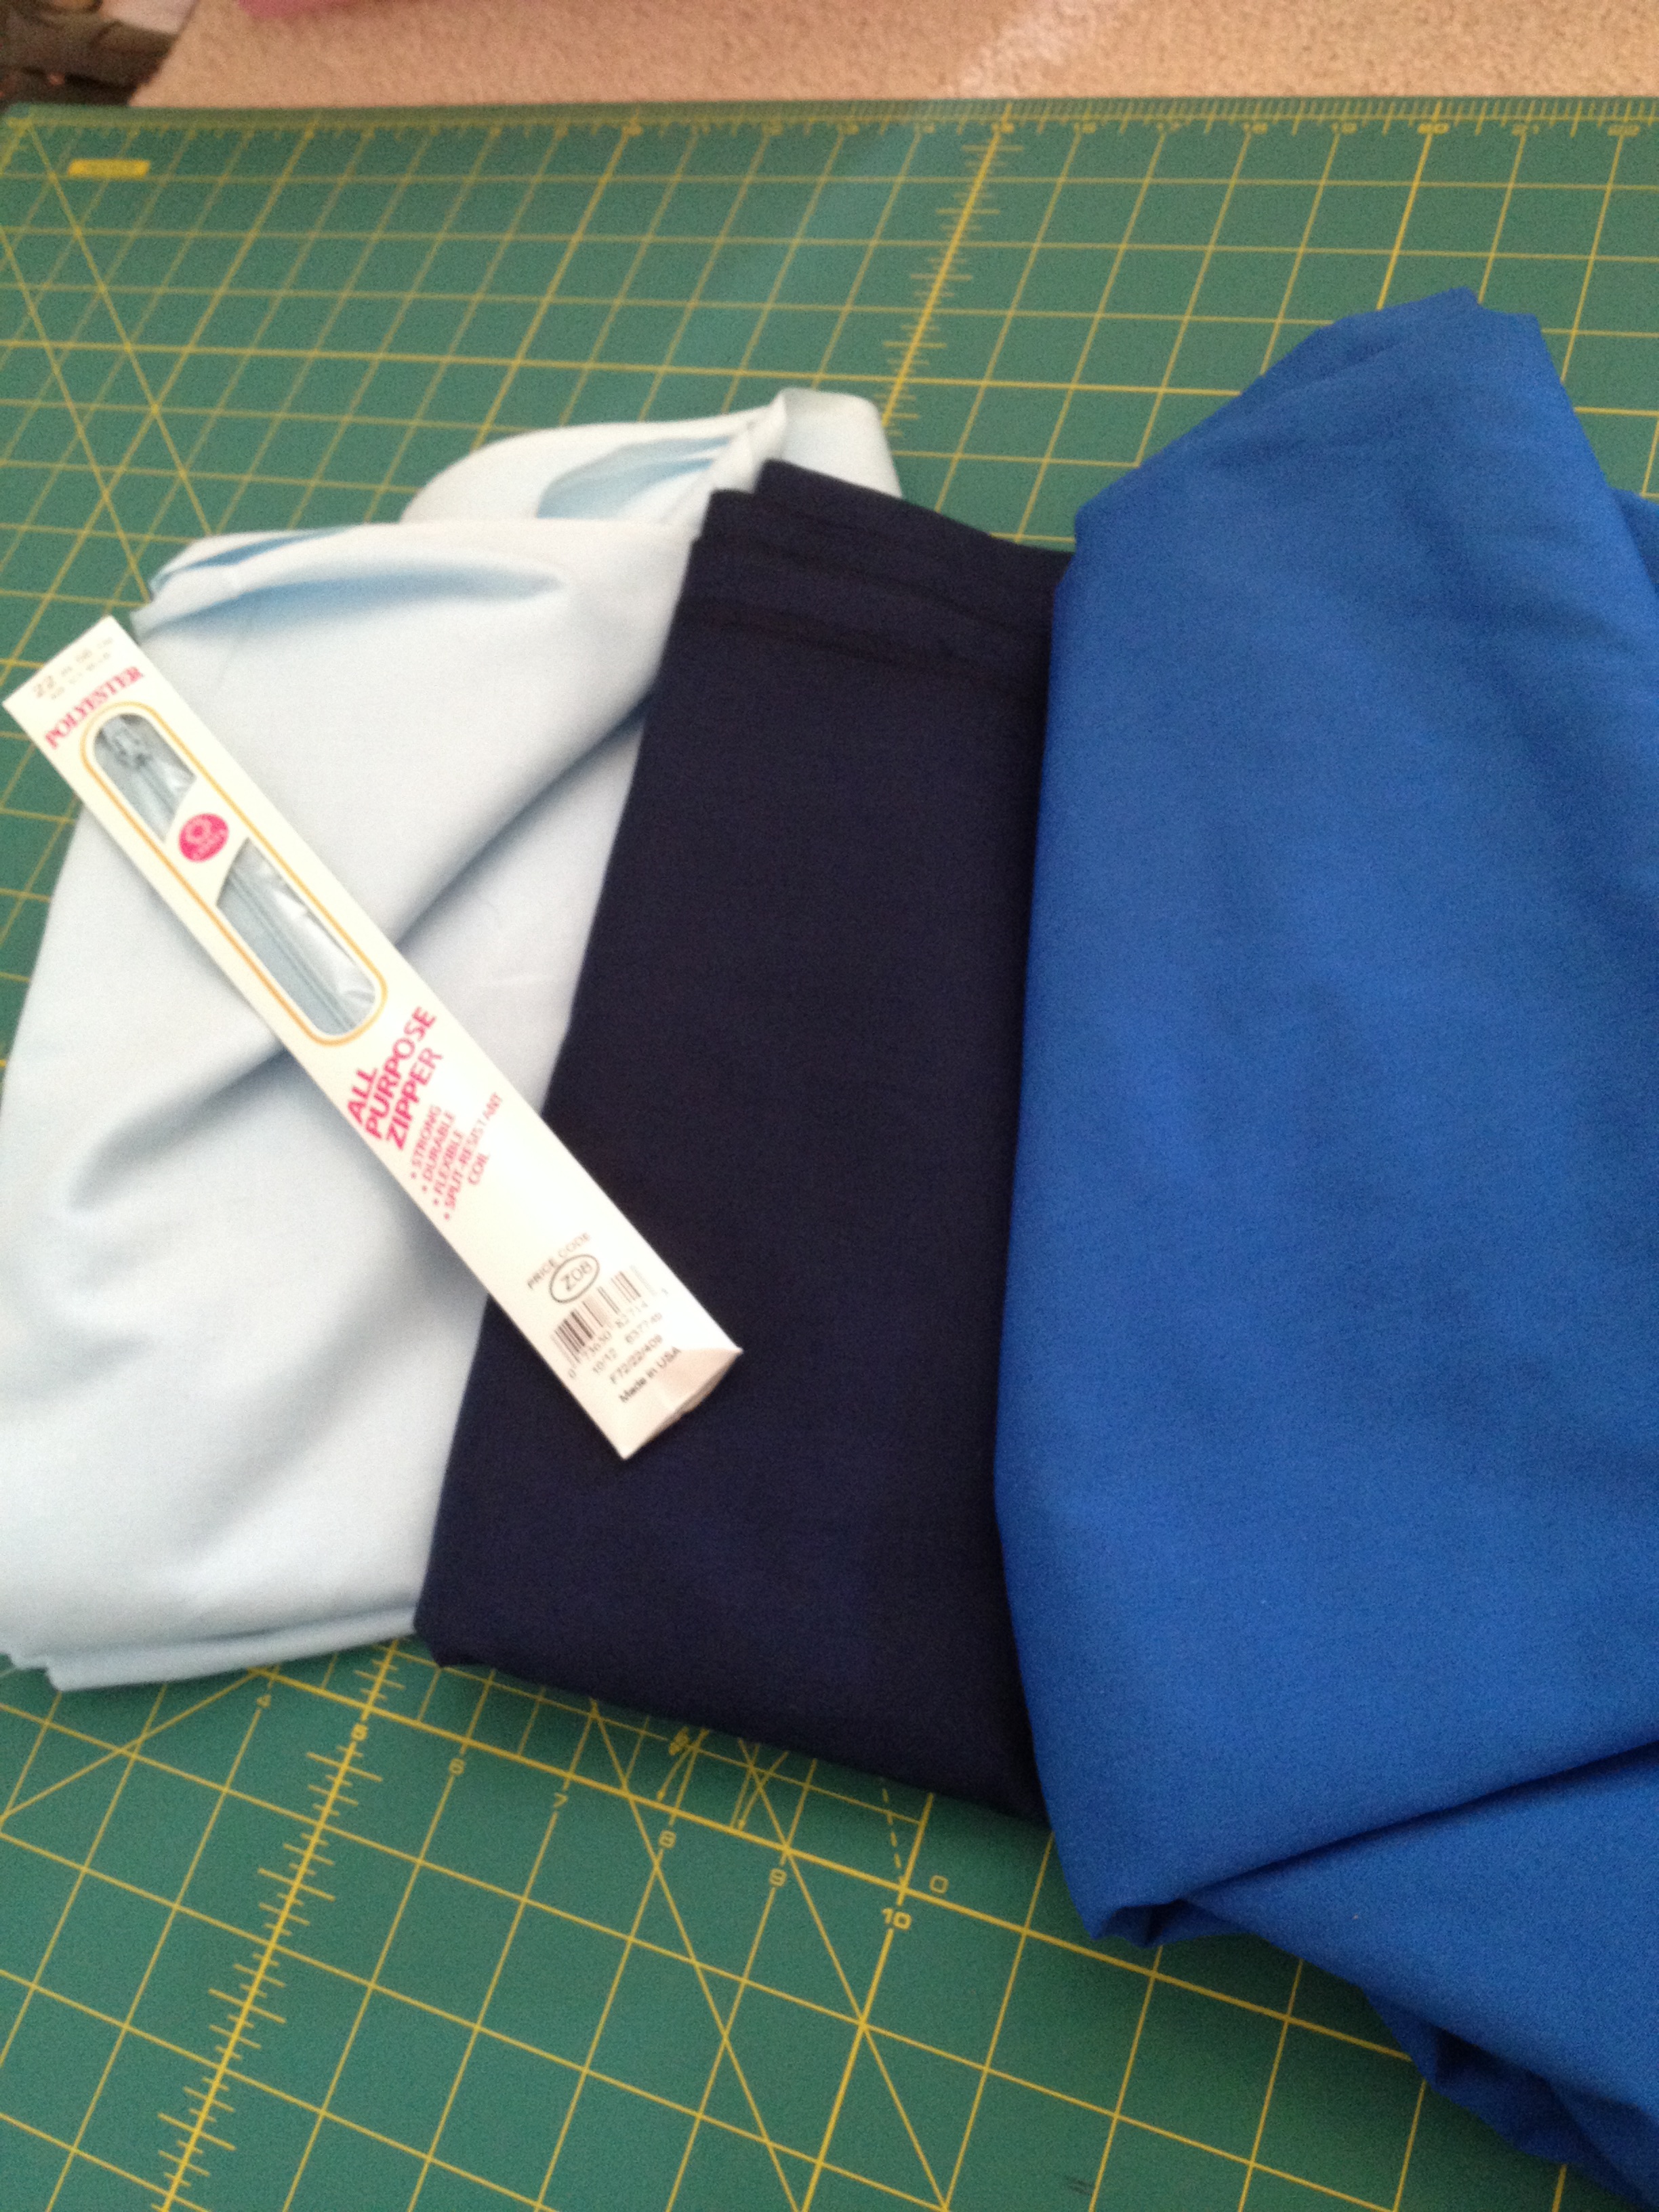
The second thing I’ve been working on is a mockup top for my next cosplay! I’ve decided to keep it a surprise, however I will say that it is Disney! I purchased my fabric earlier this week for $22! Very very excited about the low price of this cosplay! My wig should cost about $45 and then I might need a few other little things, but all in all this cosplay is going to be less than $80! Very happy. :) As an added bonus, this cosplay should only take about 4 weekends or so to make! That’s pretty darn fast for me because of the demands of school! Haha. When there are no petticoats of doom involved, cosplay can be pretty quick!
The work I did on the mockup blouse before the move.
I’m trying to modify my Alice bodice pattern for the blouse top my character wears, however I think I may need to draft my own pattern. The way the darts were made on the dress bodice pattern just weren’t meant for a blouse! I made a prototype, but it wasn’t quite working. I did alter the neckline on the dress pattern to match my character and it turned out really well, so yay!
I did make a pretty successful sleeve pattern by modifying my already modified Alice sleeve. I changed it from short to long sleeve and I’m pretty happy with it! I’m currently tweaking it a tiny bit more and then it will be good to go. Yay!
My blouse has also been my first time experimenting with a rotary cutter! I asked for one for Christmas as I have seen many seamstresses using them. Basically, its a round blade that you use to cut out pattern pieces on top of a mat: no pins required! It makes cutting out fabric go so much faster, so I have really enjoyed using it! Cuts down on hours of time!
I will keep you updated as updates are available! I just finished unpacking my sewing materials and am looking forward to a new cosplay space while in the rental house! I will have some time to sew for the first time in forever this weekend (anyone catch that reference?), so I will try and do a quick update post Sunday evening so you can see what I’ve done. :) I have tons of awesome stuff planned for the coming months and a few big surprises! Can’t wait to share all about it!
Just keep swimming!
Taria
I’d rather attempt to do something great and fail than to attempt to do nothing and succeed.”

 Wreck It Ralph. Vanellope is just amazing. Earlier this year I lost my voice, and as it was on its way out, I got this squeak like Vanellope. And it was amazing. Vanellope is one of those characters that isn’t super high on my list, but she’s one that whenever I see mint hoodies I always think about her. So maybeee this year if the mood strikes me I’ll do her, but nothing is definite.


 So here’s a bit of an overview of what all has been going on since I last posted:
 I also found a wig for Merida, thus completing her outfit. I also finished Ariel’s “Kiss the Girl” dress and Elsa/the Snow Queen, bringing my costume count to five (including Rarity).
 My mom also surprised me by taking me and my business partner/best friend to Disney for my birthday at the beginning of October for Mickey’s Not So Scary Halloween Party. It was so amazing, so I’ll have a big post on that in the future too.