Disney Pixar’s Brave: Historically Accurate?

As the title implies, this post is about the historical accuracy of Disney Pixar’s Brave.  I wrote a research paper on this topic several years ago, which was the primary reason why I made my Merida dress. I presented my research for school, and thought, “Hey, why not make a dress to go with it?”

I already posted all about my Merida dress (Part 1, Part 2, Part 3), and so this post will be all about my actual research.

So without further ado, here are my findings.

Many movies have been made about different periods in history. Each one of those movies has varying degrees of historical accuracy. Some are complete fantasy. Others are almost entirely historically accurate. And still others fall in the middle of that scale, containing historical accuracy mixed with fantasy. That is where Disney Pixar’s 2012 animated film, Brave falls on the scale. Set in a kingdom in the highlands of medieval Scotland, Brave’s fictional story is mixed with accurate costumes and sets as well as real themes and ideas that give the film a sense of believability.

According to co-director Mark Andrews, Brave takes place in 9th to 12th century Scotland.  Andrews said, “We kind of looked at the 9th to the 12th century and took all the stuff that we liked and made a fantasy Scotland” (Andrews, thesudburystar.com).

"BRAVE" (Pictured) ELINOR ©2012 Disney/Pixar. All Rights Reserved.
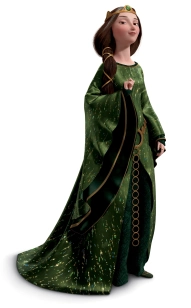
The costumes worn by the women in Brave are very historically accurate. The rich, green dress worn by Queen Elinor, Merida’s mother, is a great example of how a woman’s dress reflected her social status and wealth. Elinor’s dress is composed of at least two dress layers: a fitted under layer called a kirtle made of a dark green linen and an over-dress called a surcote made of a flowing silk-like fabric. Elinor’s dark-green underdress (kirtle) has a fitted bodice with a full floor length skirt and long, fitted sleeves that come to her knuckles. Her over-dress (surcote) has a fitted bodice with buttons up the front, a full skirt with a long train, and flowing sleeves that almost reach the ground. The skirt has a slit up the front that reveals the dark green kirtle underneath. Surcotes were a huge sign of wealth in the Middle Ages. Fabric was very expensive, especially silk fabric which had to be imported from the East. The large amounts of fabric in the sleeves and train showed that Elinor was definitely part of nobility. The buttons on the front of her surcote were also a sign of wealth. In addition, Elinor wears a gold-colored metal belt around her waist. Richly made belts were also a sign of wealth and status (Gilbert). Elinor’s hair is very long, almost floor length, and is worn parted in the middle, and wrapped with gold ribbons. During most of the Middle Ages, married women covered their hair with veils or later elaborate headdresses. However, during the 1100’s after the Norman invasion, there was a short time when women wore their hair parted in the middle and excessively long hair was a common trend (“Jewels, Hair, and Accessories”).

Photo Feb 16, 5 21 16 PM
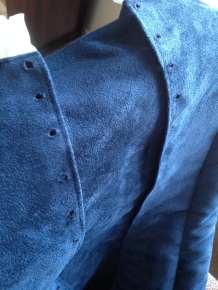
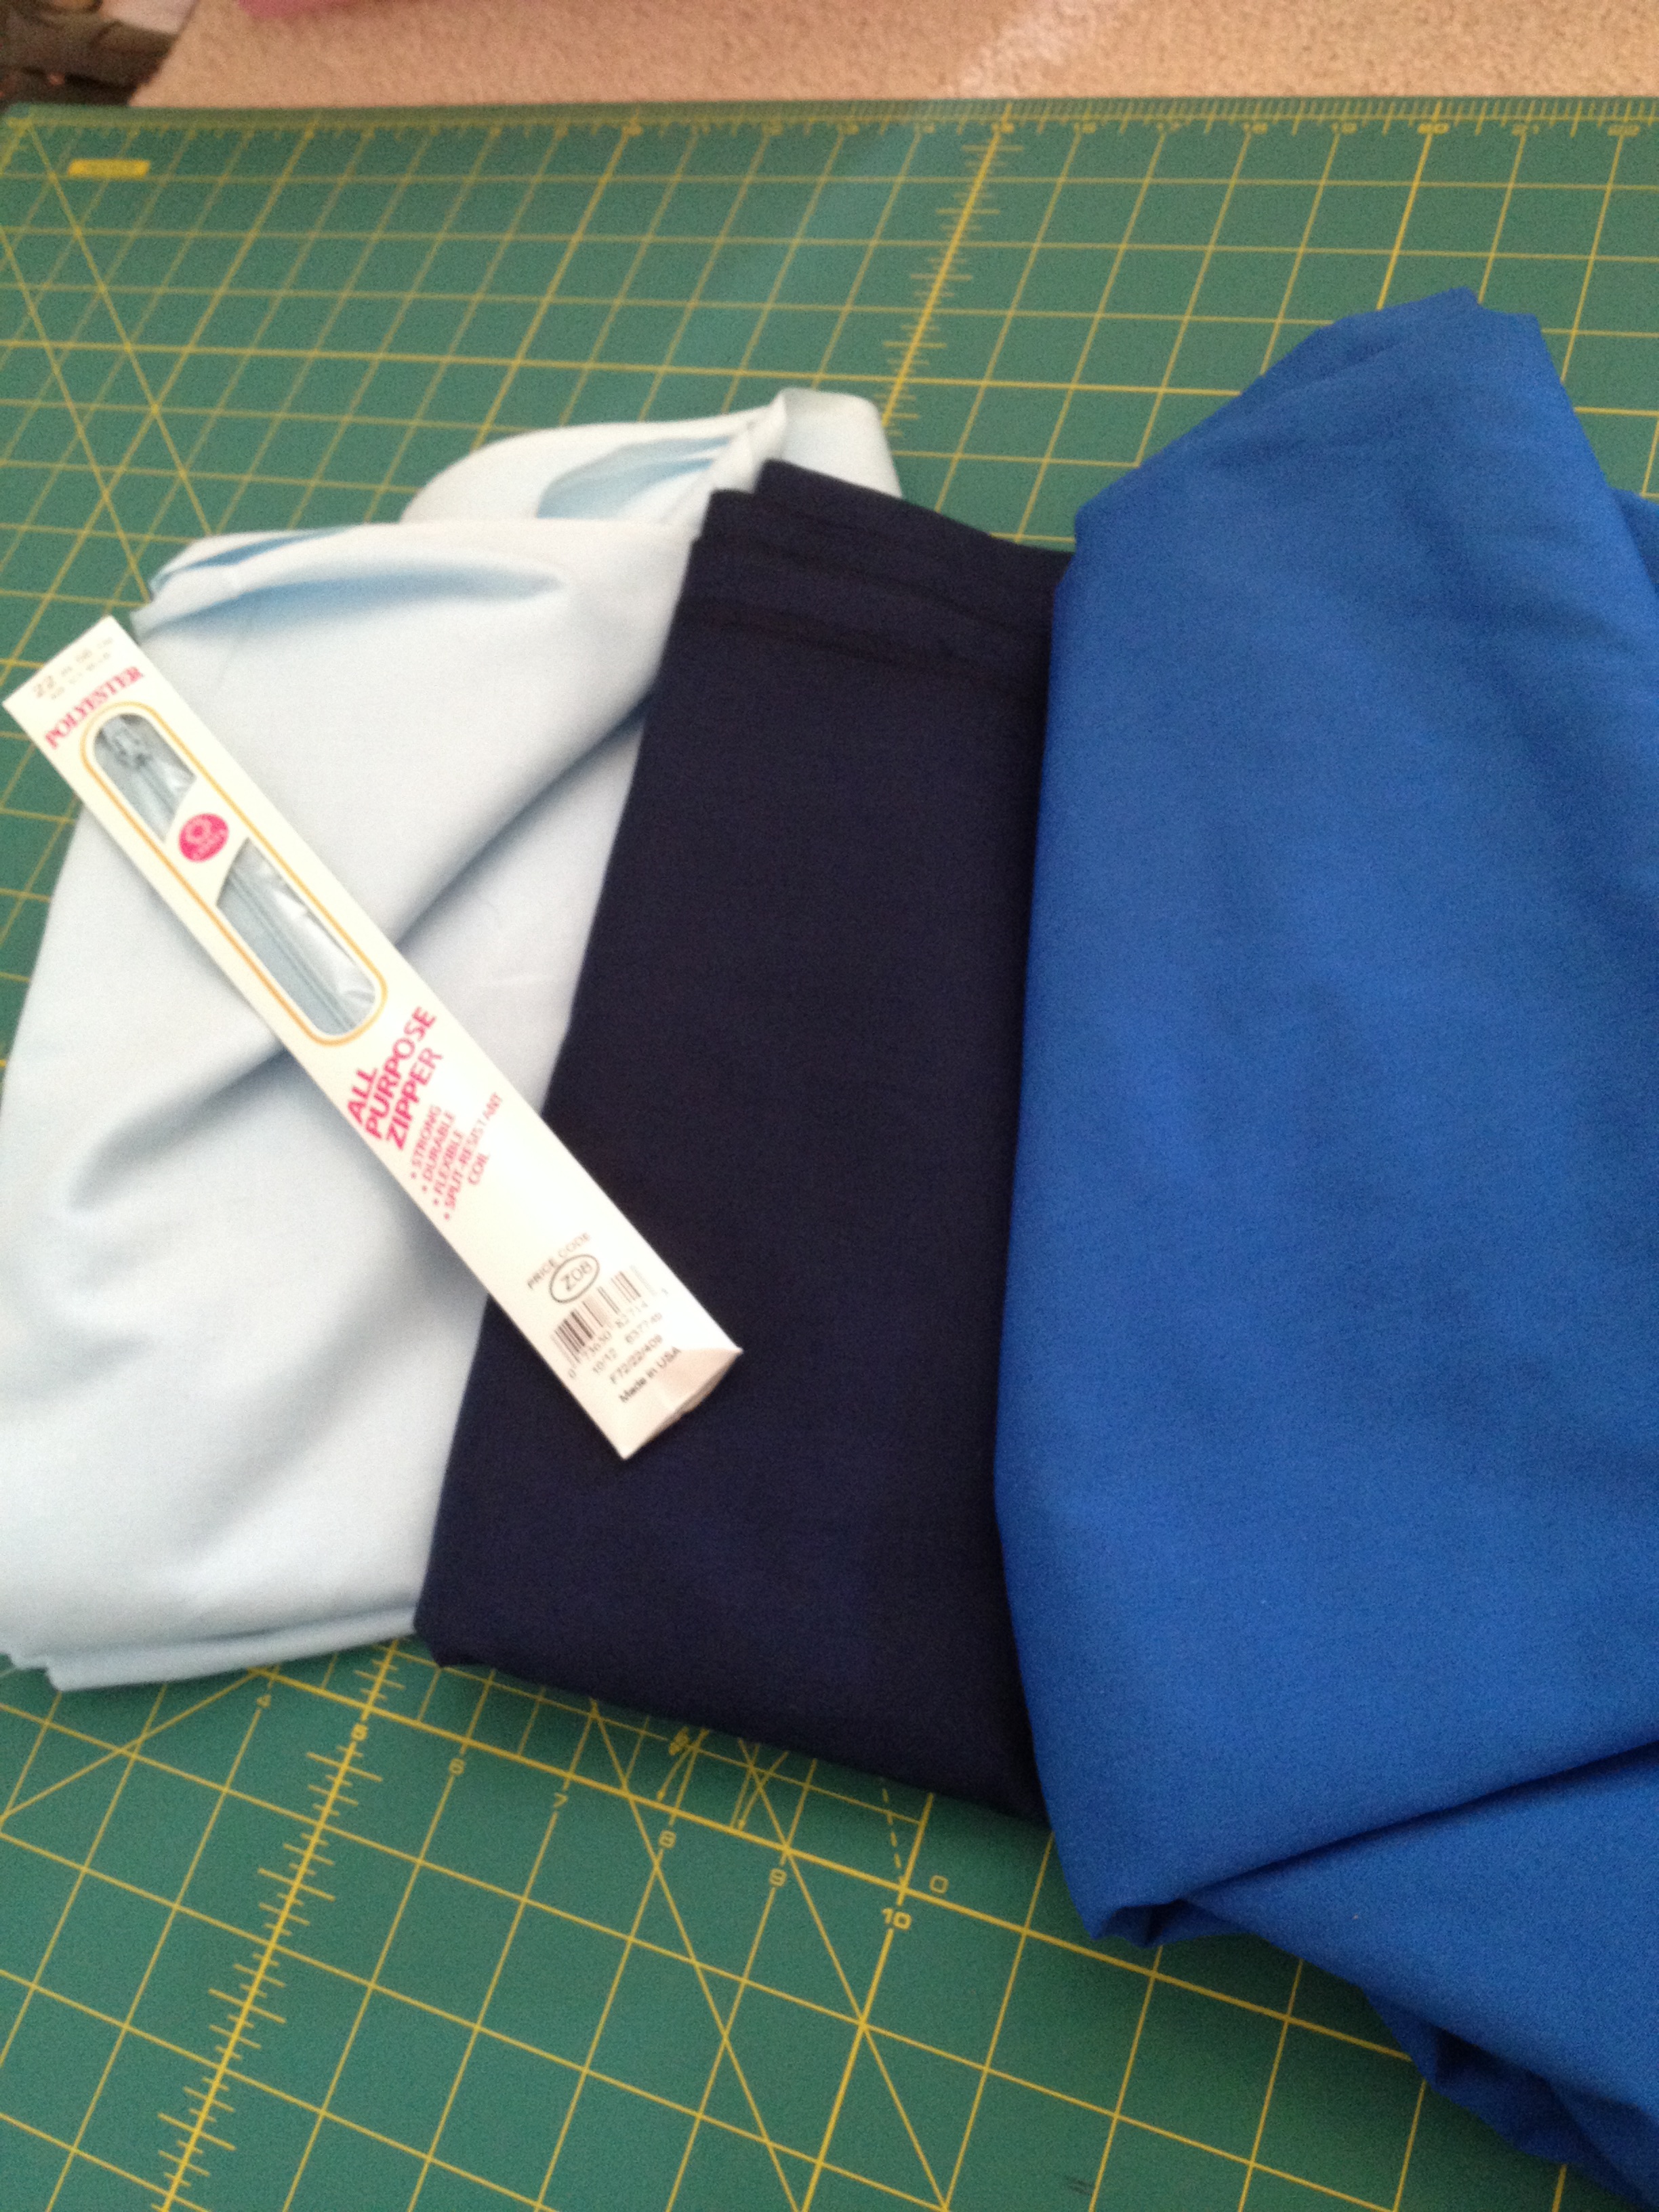
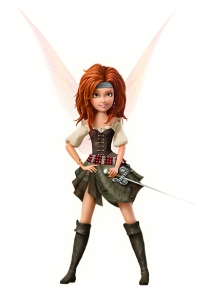
Merida wears two dresses throughout the film. Her first and primary dress is made up of  a cream colored linen chemise and a dark blue wool kirtle that she wears on the top. Merida’s dark blue overdress has slit sleeves that reveal the gathered cream colored underdress at her shoulders and elbows. The underdress is also visible at the bottom of the sleeves and around the neckline. Merida’s fiery red hair is left loose, and she wears ankle-height brown leather shoes.

Linen was a very common fabric during the middle ages because it was comfortable when worn as the layer against the skin. Wool was also very common because it was warm during the cold winters. Linen was made from flax plants and wool was spun from sheep and sometimes goats. Leather was used to make shoes, pouches, and many other items as it was readily available.

tumblr_m83rx5iAlf1rcddv9o1_500Merida’s second dress is made of a sky blue satin or silk. It is the typical kirtle style with long fitted sleeves, a fitted bodice, and a flared skirt. The dress also has a gold panel around the hem as well as gold trim around the neckline and tips of the sleeves. Merida’s wild hair is tamed in the form of a wimple, a cloth headpiece that covered the neck and hair. There has been some debate over whether or not Merida’s wimple is historically accurate for the time period of the movie. Richard Oram, a Scottish historian said, “You can see the film-makers have done their homework, even if they’ve mixed up their periods a bit. So we get . . . high-status females wearing . . . wimples, as they would have done in the 14th and 15th centuries” (Oram). Merida also wears a tight corset underneath her light blue dress which has been a topic of high debate among historians and feminists. Tight laced corsets worn as undergarments weren’t invented until the 1800’s (Thomas). Corsets existed really only by name in the Middle Ages. What we believe was called a “corset” then was a long, loose garment that was simply pulled over the head and was not used to give shape to the body at all. Men as well as women wore them, but only those of nobility and great wealth, for they were decorated with expensive jewels and fur. Their decorations imply that the medieval “corset” was worn on top of clothing, not as an undergarment. Not much more detail is known about corsets in the Middle Ages, but we do know that the “corset” Merida wears is very inaccurate.

The production team for Brave spent numerous hours researching the Scottish landscape. The team took two trips to Scotland to help really capture the look and feel of Scotland in the film. Co-director Katherine Sarafian said, “Every Pixar film, we do our research. In our case, we went to Scotland twice, and we went way, way deep in . . . we wanted this character in the movie of Scotland.” Scottish historian Richard Oram said of Brave:

I’m a keen hill-walker, as well as an environmental historian, and I kept seeing places I recognized: in an early scene, the main character, Merida, scales a rocky outcrop that’s brave fire falls
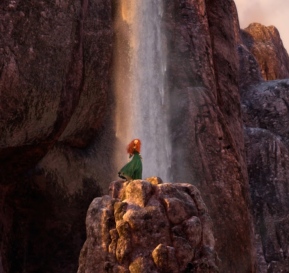
clearly modeled on Cairngorm granite, right down to the color and texture . . .The general feel – the mix of water and hills, forest and mountains – is very good: the forests are a realistic blend of Scots pine and birch (Oram).

One notable inaccuracy of the landscape in Brave is the fire falls that Merida climbs toward the beginning of the film. These falls may be the “rocky outcrop” that Richard Oram mentions in the quote above. Co-director Mark Andrews said that, “The fire falls in the movie–there are no fire falls in Scotland, but there are fire falls at Yosemite National Park. It actually happens” (Andrews, veryaware.com). So even though the falls don’t exist in Scotland itself, they are based on a real place.

Standing_stones
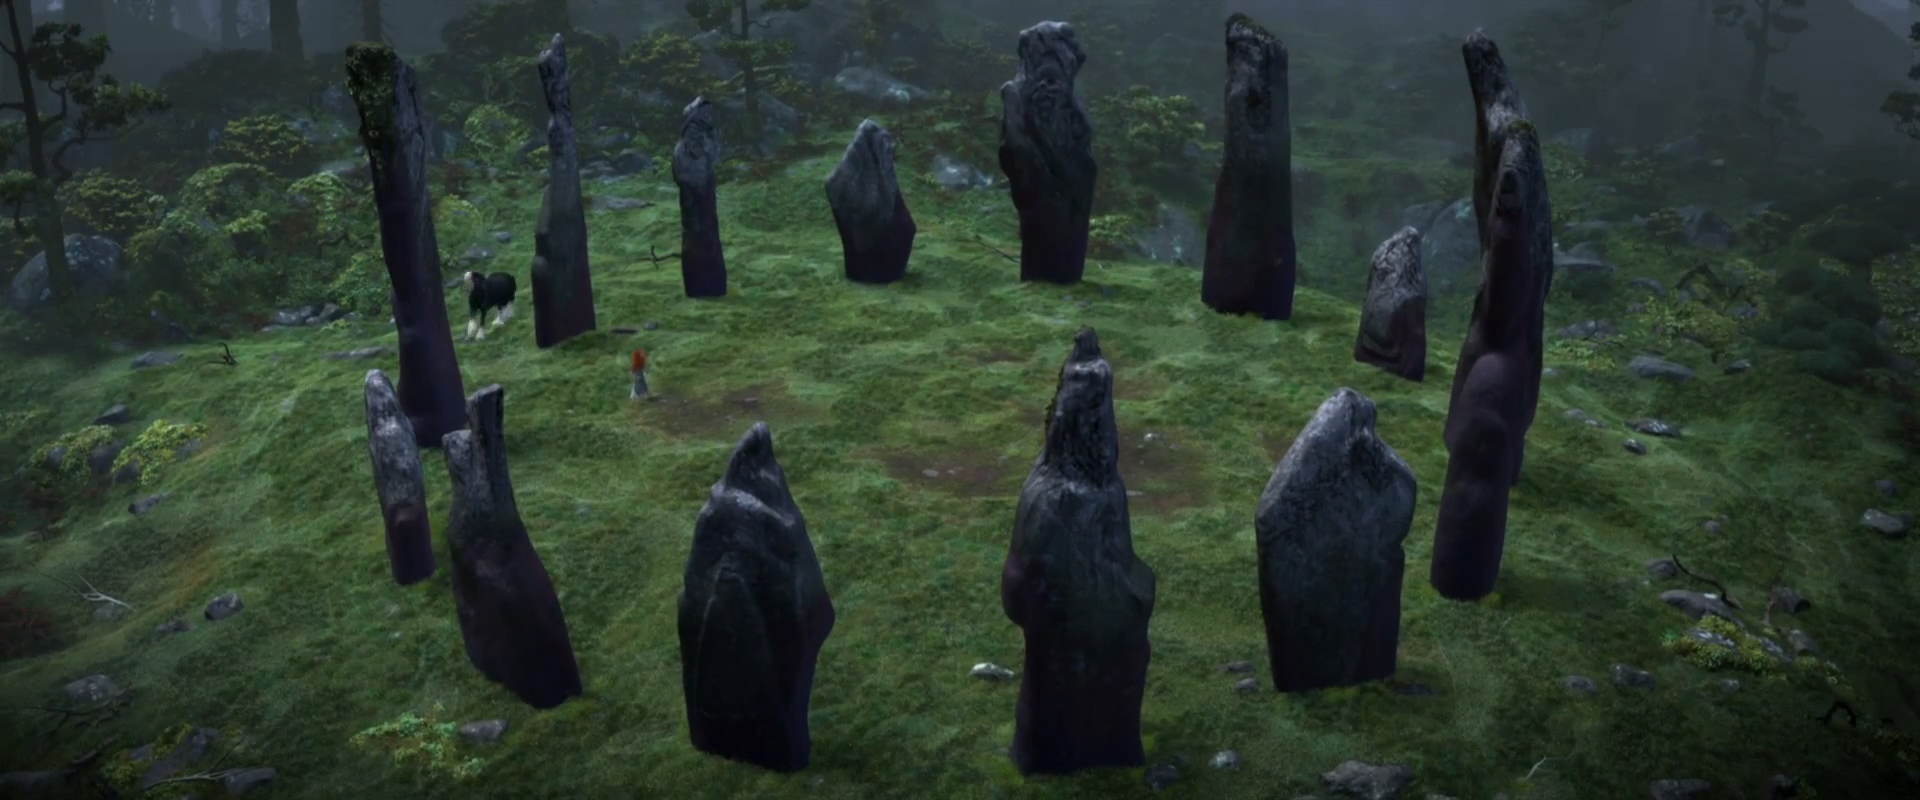
A recurring landmark seen in Brave is particular circle of rocks located in the woods around Merida’s castle. The rock formation is formally called a stone circle. Stone circles are made of large pieces of stone that have been cut and planted upright in the ground in a circle formation. Around one thousand three hundred stone circles and henges exist in Britain (including Scotland) and Ireland in various sizes (“Odyssey”). Their original purpose is unknown, and many legends surround the stone circles. Some of the most famous stone circles are on the Orkney Islands, found off the north coast of Scotland. Callanish Stones
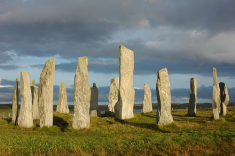
Orkney’s Ring o’Brodgar and the Standing Stones o’ Stenness are two of the most famous stone circles on the Orkney Islands. The Ring o’Brodgar is believed to have been built around 2500 BC to 2000 BC and is around three hundred and forty-one feet wide. It is believed to have originally contained one hundred and sixty stones, though now only twenty-seven stones remain (Towrie). In his book, Around the Orkney Peat-Fires, William Mackintosh describes the Stones o’ Stenness in this way: “Even in daylight the place has something uncanny about it. The Standing Stones o’ Stenness, mouldering, scarred and grey with age, rising as they do from and unbroken bed of heather always have a weird mysterious appearance.” This description fits with the feel of the stone circle in Brave and explains why Merida’s horse, Angus, was so startled by the stones that he threw Merida off his back.

CASTLE!!!!!Merida’s family’s castle is quite historically accurate in the way it was designed. The walls are made of stone with wooden doors. Stone castles replaced castles that were entirely made of wood in the 12th century.The stable where Merida keeps her horse, Angus, is located inside the castle walls, but not inside the castle living space. The majority of stables in medieval castles were kept inside the walls so they were protected in the event of an attack.

The first room inside the castle gate is the great room. The great room is lit by natural light by day and candles and torches by night, as it would have been in the Middle Ages. The walls are adorned with tapestries and stone carvings. The great room serves as the throne room, dining room, and entertainment room when needed. At dinner time, a large table is brought into the great room and Merida’s family eats around the table together, each with their own chair. When the three clans visit the castle, multiple tables and benches are brought into the room to seat the many guests. In the middle ages, only the nobility used chairs, and benches were much more common (Gravett 43). Thus, the bench seating for the clan guests is accurate.

brave-disneyscreencaps.com-1426A set of stairs in Merida’s castle leads to the bedrooms and family room. Merida’s bedroom as well as the master bedroom both contain fireplaces, candles, and torches for light in the evenings. The rooms are sparsely furnished with wooden chests and four-poster beds. Likewise, the family room has a fireplace and wood furniture. Family rooms were common in the Middle Ages as a place for the family to gather for storytelling, music, playing chess and many other activities. Chess was a very popular game among both peasants and nobility (Dixon 18). In Brave, we also see Elinor stitching her tapestries in the family room. Making tapestries as well as embroidery and music were extremely common pastimes for noble women in the Middle Ages.

Screen shot 2014-04-01 at 8.59.12 PMOne slight inaccuracy in the castle design is the use of glass. Glass in the Middle Ages was very expensive, and thus was used very sparsely in castles. Merida’s bedroom has a relatively large glass window with ironwork in front of the glass. The family room and master bedroom both have three long, rectangular windows with glass panes and ironwork. The long rectangular style window was much more likely to have been used than one large window like Screen shot 2014-04-01 at 9.02.23 PM
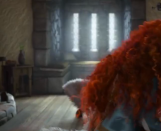
Merida’s, however there is no reason that larger windows wouldn’t have existed. In the film, there is also a small window with glass in the door to the family room. This window is used to tell the story of the film several times during the movie, however in reality, glass would have likely been too expensive a commodity to have been used on a door.

44ea0497975b51a42ad0888115d6abbe
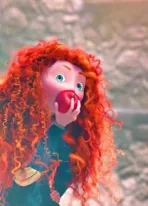
The food eaten in Brave is accurate for what would have been eaten in medieval Scotland. Multiple times during the film, we can see Merida eating apples. Fruit, such as apples, pears, and cherries, were very commonly eaten and grown in orchards outside the castles.  During the family dinner scene, Merida’s little brothers were complaining about eating Haggis, a type of pudding that was cooked in sheep stomach lining and mixed with spices, onions, oatmeal, and suet, which is a type of animal fat. On the website iGourmet.com, Haggis is described as “a national culinary icon in Scotland.”

brave-disneyscreencaps.com-1190Merida and her brothers are seen several times throughout the film trying to steal a type of sweet cookie with icing and jam on the top. Recipes for these cookies, called “tipperary biscuits,” are still around today (allrecipes.com). During the dinner scene, King Fergus is shown eating a type of cooked meat. Meat from all sorts of birds and animals were eaten in medieval Scotland, including beef, mutton, and sometimes venison if it was caught on a recent hunt. Fish were also a very common meat in Scotland. Herring, pike, bream, and salmon were all common types of fish (“Scotland’s History”). The abundance of salmon in the stream that Merida catches with Elinor would have been highly likely. Today, Scotland is one of the top exporters of salmon.

brave-disneyscreencaps.com-4207The most obvious inaccuracy with regards to food and meals in Brave is the use of forks. The movie shows the table set with three-pronged forks, however forks were not used in the Middle Ages. Spoons and knives were used, but forks were unknown at that time.

Legends play a big role in the story of Brave. Merida states in the opening of the movie that, “The story of how [her] father lost his leg to the demon bear Mordu became legend.” Queen Elinor gives Merida lesson on selfishness in the form of a legend about an ancient kingdom. Merida’s lackadaisical attitude about the legend prompts Elinor to respond that, “Legends are lessons, they ring with truths.”

will-o-wispTwo important themes and ideas in Brave stemmed from Scottish legends and mythology. The magical “Will o’ the Wisps” are rooted in Celtic legends as well as scientific reality. Co-director Mark Andrews sums it up best in an interview. He said,

The will o’ the wisps are in a lot of Scottish folklore. They were said to lead you to treasure or doom–to change your fate– but they’re an actual phenomenon of swamp and bog gas seeping up through the earth and interacting with the natural resources to create the blue flames. People would follow these lights thinking they were little fairies, and basically drown or get sucked down into the bogs. [So] we made the wisps like actual little spirits (Andrews).

MorduEven the ideas of the evil bear Mordu and Queen Elinor’s transformation into a bear originated from Celtic mythology. Director Mark Andrews said, “I think the bear aspect . . . there’s all these things in Celtic mythology about transformation into animals, so that was something that we pulled from and put into the film” (Andrews, veryaware.com).

Girls didn’t attend school in the Middle Ages since an education was not important for women during that time. Girls of nobility were taught how to sew, spin thread, and weave fabric. They were also taught correct manners and proper behavior.

The movie’s focus on a headstrong female character would more than likely have been accurate in Scotland. Scottish historian Richard Oram says, “The fact that the film has a strong woman at its centre may be quite accurate: we know very little about women in medieval Scotland, but those we do know about seem to have been pretty feisty.”  Merida’s betrothal to one of the three lord’s sons is also a large theme of Brave. In the Middle Ages, marriages were very often arranged for monetary gain. A noble woman’s family usually gave a dowry of land to their daughter’s spouse, so who a man married was Tapeta Brave 3D (created full3d)
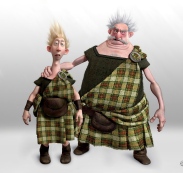
a big deal (Amt). Young Dingwall, son of one of the three lords, said in the film (of the arranged marriage), “Why shouldn’t we choose?”, his father’s response was, “But she’s the princess!” At this, young Dingwall commented back to his father that he “didn’t pick her out, it was [his father’s] idea.” A woman could marry at the age of twelve, and boys could marry at the age of fourteen (Macdonald 24), thus Merida’s betrothal while she was a teenager was not uncommon.

Merida’s reluctance to marry makes sense. Once a woman was married, she took on all the responsibilities of a wife. In the Middle Ages, “marriage was a full time job. A wife had to help her husband run his business or manage his land while he was away.” A woman in medieval Scotland could refuse an arranged marriage if she had the courage to do so (Scott), however such an act was seen as selfish. Co-director Mark Andrews said, “You had this very traditional society that she wants to break with and find her own sense of person, so by having her mother, i.e. society, be in her way of what she’s not ready to accept yet, she gets a little selfish and she gets desperate” (Andrews, veryaware.com).

Though we can see why Merida might have wanted to retain her freedom, her refusal to marry was also a refusal to accept responsibility. A refusal to grow up and do what many women before her had done. She selfishly and stubbornly insisted on living at home and was willing to go to great lengths to get her way. The movie makes the viewer sympathize with Merida and view Queen Elinor as a mother unwilling to listen to her daughter, when in reality, Merida was the one at fault.

brave-disneyscreencaps.com-2746One thing that I didn’t have in my paper but discussed in my presentation is a particular symbol. There is a symbol, I assume one that represents Clan DunBronch, that combines a celtic knot pattern with a bear. You can see it a little bit behind Merida and her family during the scene at the Highland Games, and it is also the design on the hem of Merida’s skirt at the very end of the movie and in the Disney Parks.

An artist's rendering of Merida's dress at the end of the movie where you can clearly see the bear design on the hem.
An artist’s rendering of Merida’s dress at the end of the movie where you can clearly see the bear design on the hem.

While researching, I came across an Screen shot 2014-02-03 at 11.20.16 AM
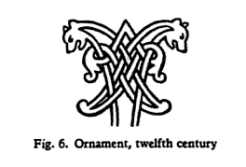
online eBook that had this symbol in one of its preview pages as shown at the right, and I was shocked at it’s resemblance to the symbol in Brave. I don’t know if the filmmakers knew this symbol existed while they were making the movie, but regardless, it just adds one more tiny historically accurate detail.

So that’s what I have for you! I hope it was enlightening, or at least showed you maybe one or two things you didn’t know about Medieval history! I was truly amazed at how accurate even some of the tiniest details of the movie turned out to be! Disney Pixar’s Brave is filled with numerous historically accurate details, from the costumes and setting to the themes and ideals. Though it contains a few inaccuracies for the sake of storytelling, Brave’s overall historical feel makes the viewer feel as if they are really in historical Scotland. The research completed by the producers before creating Brave is especially evident through the amount of historically accurate detail portrayed in the film. So even though Brave is historical fantasy, you can learn a great deal about life in Medieval Scotland by watching the film.

Hope you enjoyed it!

Taria

“Hard work does not necessarily guarantee success, but no success is possible without hard work.” 

Dr. T. P. Chia

Bibliography

Amt, Emilie. Women’s Lives in Medieval Europe. New York: Routledge, 1993.

Andrews, Mark. Interview by Bruce Kirkland. “Brave Accurate, Just Not Historically.”  The Sudbury Star. 25 June 2012. <http://thesudburystar.com/2012/06/25.brave-accurate-just-not-historically&gt;. (25 Feb. 2014).

Andrews, Mark and Brenda Chapman. Interview. “Scottish Story of ‘Brave’ Springs from Reality.” <http://movies.inquirer.net/?p=5204&gt;. (4 March 2014).

Andrews, Mark and Katherine Sarafian. Interview by Courtney Howard. “BRAVE’s Katherine Sarafian & Mark Andrews Talk Technique, Inspiration, & Strong Heroines.” Very Aware: The Movie Blog. 21 June 2012. <http://veryaware.com/2012/06/interview&gt;. (24 Feb. 2014).

Dixon, Philip. Knights & Castles. Sydney: Weldon Owen Inc., 2009.

Ford, David Nash. “Early Kingdoms of Scotland.” Early British Kingdoms. 2001. <http:// http://www.earlybritishkingdoms.com/adversaries/kingdoms/scot498.html>. (25 Feb. 2014).

Gilbert, Rosalie. “Rosalie’s Medieval Woman.” 2003. <http://rosaliegilbert.com/index.html&gt;. (10 March 2014).

Gravett, Christopher. Castle. New York: Alfred A Knopf, Inc., 1994.

“Jewels, Hair, and Accessories of the Middle Ages.” 21 Sept. 2011. <http://sites.tufts.edu/ putajewelonit/2011/09/21/glossary-of-english-hairstyles-headdresses/>. (24 Feb. 2014).

Macdonald, Fiona. First Facts About the Middle Ages. New York: Peter Bedrick Books, 1997.

Mackintosh, William R. Around the Orkney Peat-Fires. <http://www.orkneyjar.com/history/standingstones/index.html&gt;. 24 Feb. 2014).

Oram, Richard. Interview by Laura Barnett. “A Scottish Historian on Brave.” The Guardian. 30 August 2012). <http://www.theguardian.com/film/2012/aug/29/scottish-historian-view -brave>. (24 Feb. 2014).

“Scotland’s History: Food and Drink.” Education Scotland. <http://www.educationscotland.gov.uk/scotland’shistory/medievallife/foodanddrink/index.asp&gt;. (24 Feb. 2014).

Scott, Amanda. “Women’s Rights in Medieval Scotland.” The Medieval Chronicle. August 2010. <http://www.themedievalchronicle.com/septoct01/Women_Rights_Scotland_JulyAug 2010.html>. (25 Feb. 2014).

“Scottish Food.” igourmet.com. <http://www.igourmet.com/scottishfood.asp&gt;. (24 Feb. 2014).

‘Stone Circles of Scotland.” Odyssey: Adventures in Archaeology. <http://www.odyssey adventures.ca/articles/stone-circles/article_stonecircles.htm>. (24 Feb. 2014).

Thomas, Pauline Weston. “Stays to Corsets–Fashion History.” Fashion-Era. <http:// http://www.fashion-era.com/stays_to_corsets.htm> (10 March 2014).

Towrie, Siguard. “Orkney’s Standing Stones.” Orkneyjar: The Heritage of the Orkney Islands. <http://www.orkneyjar.com/history/monoliths/index.html&gt;. (24 Feb. 2014).

Walker, Jane. 100 Things You Should Know about Knights and Castles. Essex: Miles Kelly Publishing, 2001.

Williams, Brenda and Brian. World Book looks at The Age of Knights and Castles. Chicago: World Book, Inc., 1996.

Grommets, Eyelets, and Anvils, Oh My!

To the beginner, grommets and eyelets seem daunting.

Or maybe it’s just me. I don’t know. But the first time I made a corset, the thought of figuring out how to insert grommets scared me. Too much was unknown for me to get a good understanding on how they worked, and I’ve found I like to have all the information I need before jumping in with a new project. So I put off corset making for a while simply because grommets overwhelmed me.

Pretty much my entire sewing experience has been learning by doing. Just jump in with two feet and see what happens. So far I have yet to cause any non-repairable damage to things I’ve been making, which mostly means a lot of prototyping before I work on something I would really hate to ruin.

photo-1
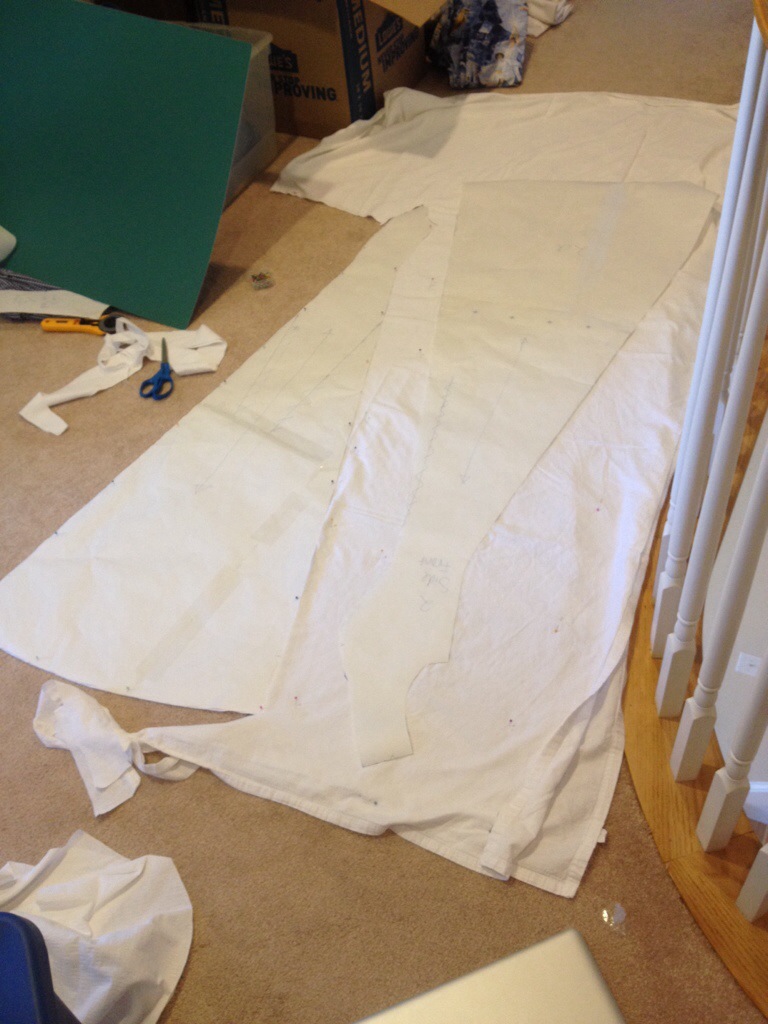
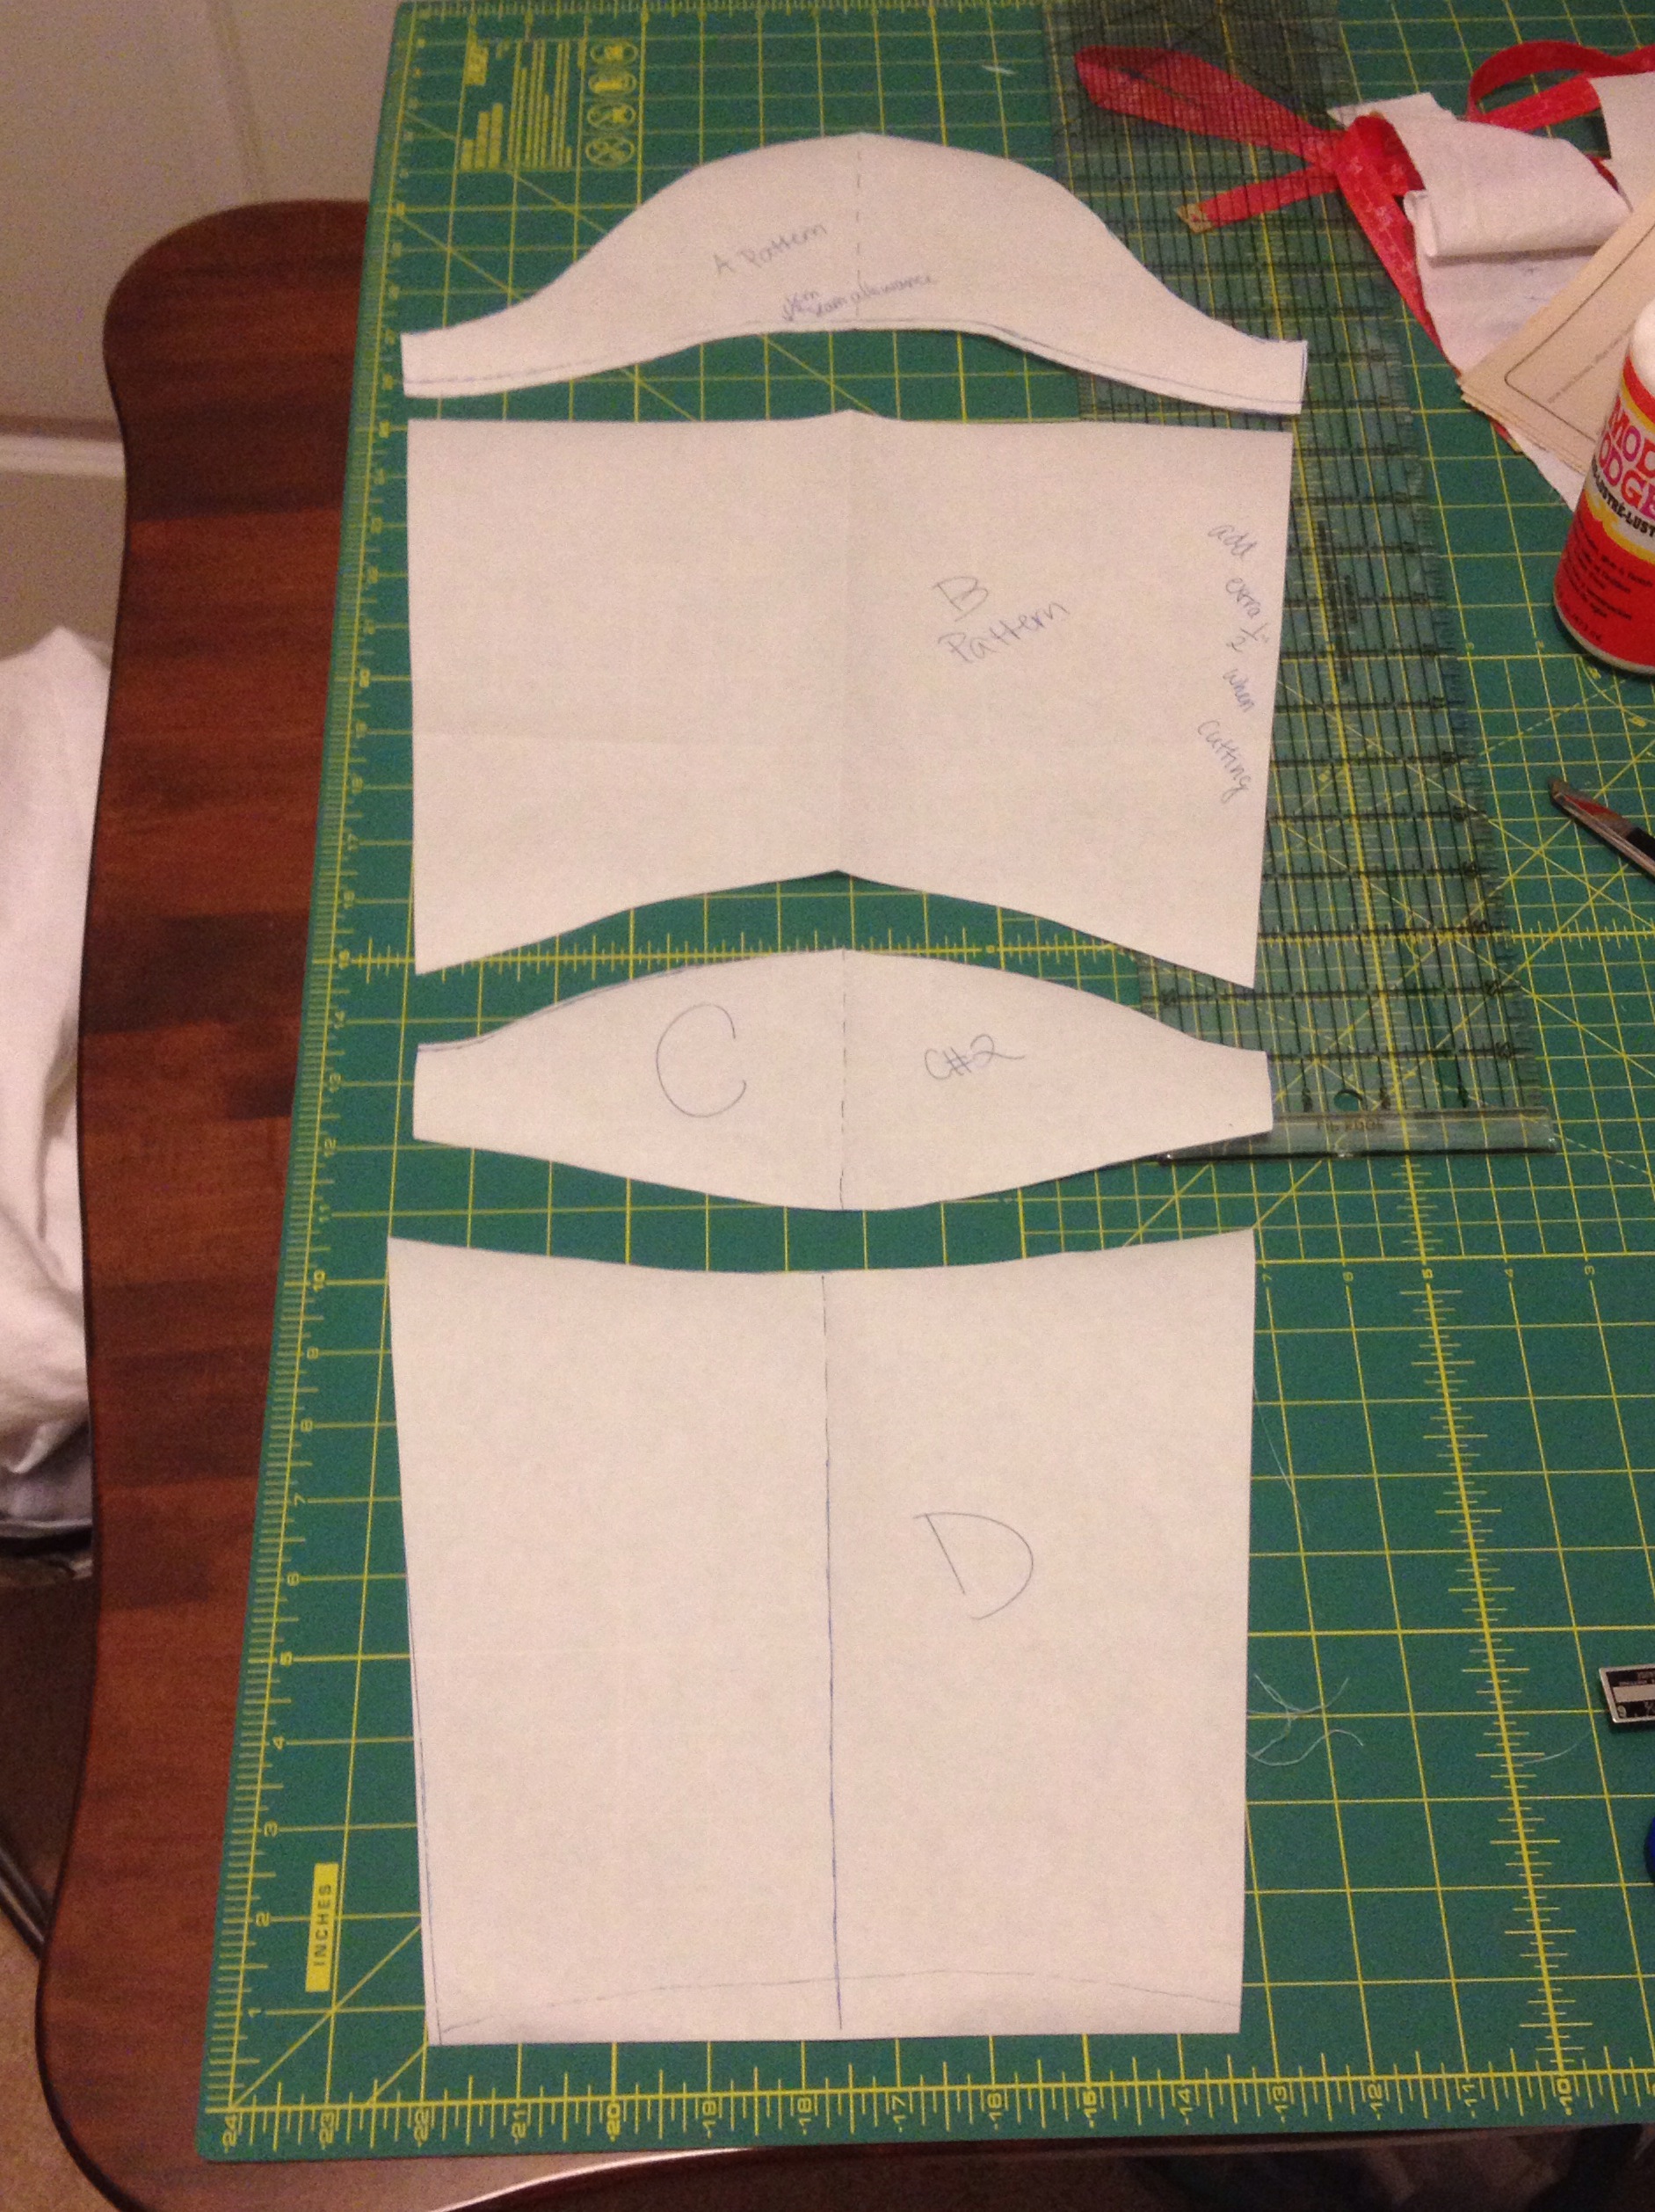
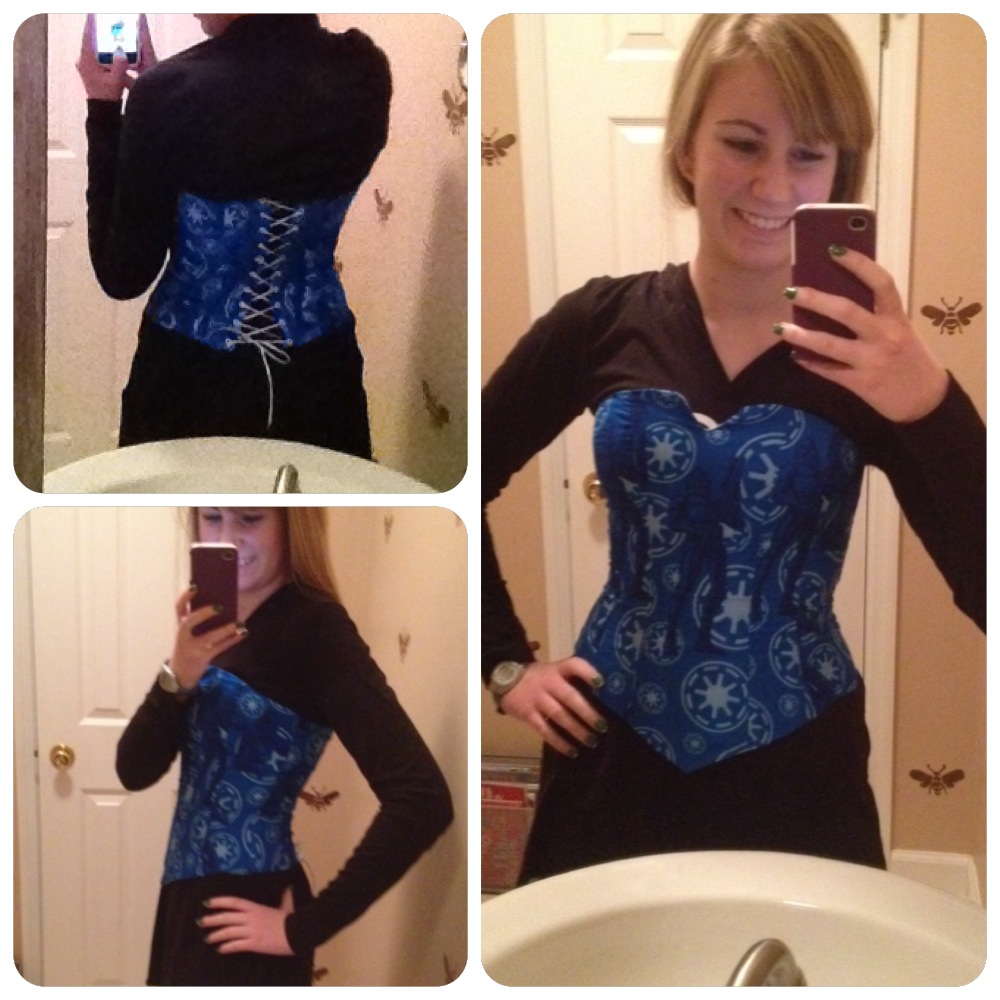
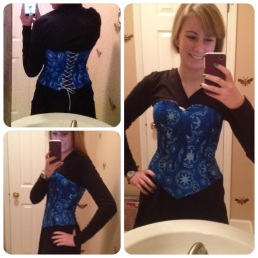
In the case of corsets, my prototype was in the form of my Clone Trooper corset. I didn’t actually intend for this to be a wearable item when I first started it in white cotton just to experiment with the pattern (New Look 6480), but it was going so well I decided to cover it with Clone Trooper fabric (bed sheets). This corset gave me a good handle on the basics of corsetry, or in this case, fitted and structured bodices. Each time I make a corset, I become more and more comfortable with modifying the shape, how to get the best fit, etc. So as far as making corsets, just jump in with a pattern and experiment.

So when it came to eyelets or grommets, I knew the best way to figure it out, was just to research a little bit and jump right in . . . on a prototype (because I’m not THAT brave ;)

First off, some background information. The names “eyelets” and “grommets” are typically used interchangeably, but they do refer to slightly different things. Eyelets are usually found only in small sizes, but grommets have a larger range of sizes and can be up to several inches wide. Grommets also often are installed with washers on the back that help hold everything together.

grommetpliers
These are the pliers I purchased, but I used different nickel eyelets.

On my Clone Trooper corset, I purchased silver eyelets and installed them with a snap and eyelet pliers kit from Michaels. With the pliers, you use the punch feature on the pliers to punch a hole in your fabric, put the eyelet in the hole, and then squash the eyelet flat with the pliers to keep it in place. Two or three eyelets came out ok, but others came out super crooked, and there were several that fell out of the corset when I put it on. I had to cut a few off the pliers with wire cutters because they got stuck. Yeah, I wasn’t happy. After a little more research, I figured out that I wanted grommets with washers, and that the better way to install them is with a hammer and special anvil.

215rpQ1Jb3L
The disc on the right is the anvil, and the rod on the left is the setter.

So now I knew what to buy, but where on earth do you buy it? I bought an anvil and setting tool from Tandy Leather on Amazon in size #00 (3/16″) grommets, but it didn’t really work very well. The anvil was little bit too big for the grommets I purchased, so the grommet wiggled around inside the anvil, which made them come out wonky. So I ended up buying an anvil tool from Hobby Lobby. It was made for eyelets a size smaller than the grommets I had purchased, but it worked much better because the grommets didn’t shift inside the round anvil while I was setting them. I still used the setter from my Tandy tool and the anvil from the Hobby Lobby one.

I bought two-part grommets, also in size #00 (3/16″) from Gold Star Tool.com. They worked ok, but they still didn’t always come out right.

CMS-GST-00K
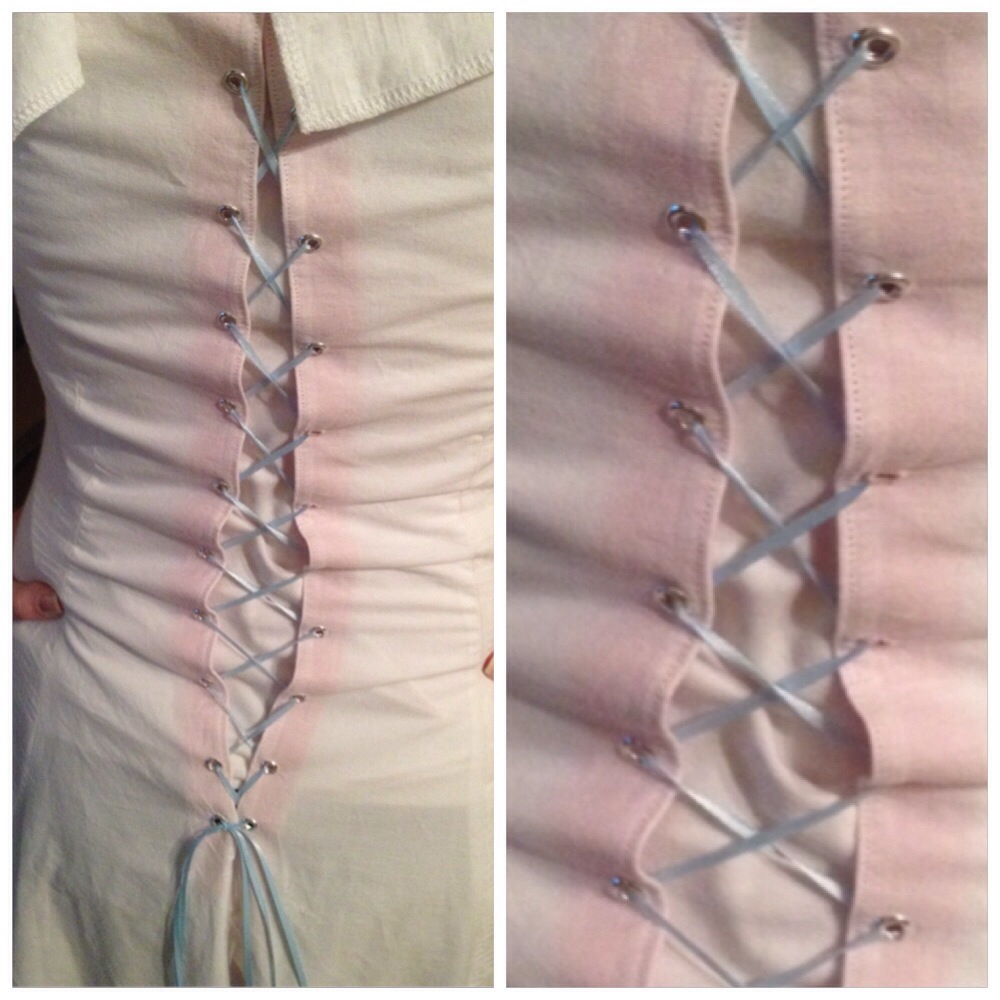
After a little more looking, I finally found the perfect grommets and setter from CorsetMaking.com! The setter
fits a size #00, and the grommets that come with the kit, along with the ones that Corset Making.com sells are perfect. Every single grommet comes out right.  I use the punch that comes with the kit, and it makes the perfect sized hole.

If you think you will be making several corsets in the future, it is so worth it to buy this kit. I cannot recommend it enough. Don’t waste your money on bad setters just because they’re a little cheaper! Your bodices will thank you.

A tutorial for inserting grommets can be found on the “Adonising” Dressing for Dinner blog here. I wish I knew the author of the article but didn’t see her name!

So that’s that on grommets. I hope this information can find its way to someone who needs it so that you don’t have to search for hours to find this information like I did. Feel free to contact me if you have any questions!

Until next time!

Taria

“The way to get started is to quit talking and begin doing.”

Walt Disney

A Look Ahead

2014 is over. What?! So crazy all that has happened in 2014, most of which I already talked about in this post, so I’m going to instead focus on what I hope to do in 2015.

Cosplayers always have a list of characters they hope to cosplay. And it’s usually a long list. I am no exception to this stereotype. I remember when I first started learning about cosplay I thought it was crazy how people would make 10-20 cosplays over the span of a couple of years. Then I actually made my first cosplay and I totally understand. Once you see what you can do, you just want to keep going. It’s an obsession in its own right.

8915626403_f51a0930bb-1
Image creds to Jon Fiedler

One of my main character goals for 2015 are fairies. Two fairies to be specific. Tinker Bell and Zarina, aka the Pirate Fairy. I have wanted to cosplay Tink for a longggg time. Back when I was five or six, I was Tinker Bell in one of my ballet recitals, and I was on cloud nine the whole time. There’s just something about Tink I’ve always been drawn to. I’m hoping the shape of my dress will be close to the one pictured on the right. I believe it is Tink’s dress in a parade in Tokyo Disney Sea, but I’m not sure. I just like the overall shape of it better than her dress here in Disney World.

Fai_profile_409x571_zarina-1


Once I saw The Pirate Fairy earlier this year, I knew I wanted to do Zarina too. The design of her outfit is just so awesome! Periwinkle from Secret of the Wings is in my mind for sometime down the road, but she’s not immediate like Tink and Zarina. I finally  purchased the wings of my dreams a few weeks ago, so the door to the fairy cosplay world is wide open.


I think one of my favorite Disney movies is latest
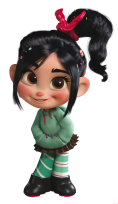
Wreck It Ralph. Vanellope is just amazing. Earlier this year I lost my voice, and as it was on its way out, I got this squeak like Vanellope. And it was amazing. Vanellope is one of those characters that isn’t super high on my list, but she’s one that whenever I see mint hoodies I always think about her. So maybeee this year if the mood strikes me I’ll do her, but nothing is definite.


I really really want to make a Flower Maiden dress like the Flower Maidens in the Disney World parade, Festival of Fantasy. I am obsessed with these dresses. Anyone that knows me knows about my obsession and rolls their eyes. Yes, the dresses are all the colors of the rainbow. Yes, they’re poofy and slightly gaudy, but THEY’RE FLUFFY AND COLORFUL AND TWIRLY AND I MUST HAVE ONE. The bad thing is, it’s a huge undertaking. So much fabricccc. So I don’t know if it will happen this year, but I certainly hope it will and will try my best.

IMG_7251

VERY HIGH on the priority list are Jedi Robes. I will turn 18 this year, which is the age for acceptance into the Rebel Legion: a Star Wars costuming organization. I have been waiting and waiting to be old enough to join, however I still don’t have a costume to join with. I hope to one day add Ahsoka and cosplay her for events with them, however I don’t think she will be finished by my birthday, which is when I would really like to join. I have the proper hairstyle for Siri Tachi, a blonde Jedi from a few different Star Wars novels, so I’m using her outfits as my inspiration. She has a couple of different robe colors and styles from book covers, so there are a few different options with her robes. I have enough skills now that Jedi robes should be a breeze, I just have to, you know, actually make them.

Siri_Tachi SiriTachi_BritneySpears SiriTachi-SOTJ-1

Ahsoka_Tano

Speaking of Ahsoka, I need to kick her into high gear. I finally have funding and knowledge under my belt that I need in order to make her properly, I just have to, like the Jedi robes, actually make her. I’m wanting to do a latex headpiece, so I know that is going to take a lot of time to do. And frankly, even though I know how to do it, the thought of all the sculpting and mold-making really scares me. So we’ll see what happens with her this coming year. Maybe I’ll at least get the fabric bits done!

So I think that’s about it! My cosplay “list” is wayyy longer than what is listed here. I have so many cosplay dreams it’s crazy. I can’t wait to see what 2015 holds!

May the Force be with you!

Taria

8335819_orig

Merida’s Hair . . . It’s Full of Secrets

Merida’s hair. The nemesis of cosplayers everywhere.

I mentioned in my final Merida post that I was still looking for a wig for her. And I kept looking for about another month and a half.

People I asked where they bought their wigs generally couldn’t remember or would give me a generic answer such as “Oh it’s just a cheap wig off Etsy.” Unfortunately, there are a bunch of cheap Merida wigs on Etsy. Many of them are from China, so I didn’t really want to risk buying yet another bad wig I would have to pay return shipping on overseas.

IMG_8872 2
She’s the best. <3

Finally, I found a girl on Instagram who bought her wig from Wig Secret. I liked the way it looked, I could see a real picture, and I knew that she liked it. I had looked at this particular wig before, but I just didn’t know if it was exactly what I wanted or not. I liked the way it looked on her, and I was tired of looking and didn’t want to take a risk.

I ordered from Wig Secret’s website, not their eBay. I forget the exact math, but it was cheaper to order directly from their site versus their eBay store. I purchased their Lioness wig in Fox Red. It has the length and fullness that Merida needs, but it’s more of a red color than orange, as you can see in the picture with Merida in Disney World. Merida’s hair is usually a little curlier on the top, but her mother had helped her wash it recently, so the curl was relaxed on a little bit. I was blessed to be able to attend Mickey’s Not So Scary Halloween Party back in October after my birthday, so I chose to attend as Merida. More on that in a later post.

Hope this helps anyone looking for a Merida wig! Merida is my favorite character to be. She’s just so fun, and the accent is amazing.

As Merida would say, “Be brave, warriors!”

Taria

I-will-fly-chase-the-wind-and-touch-the-sky-2
Image credit to Ginger Disney Princess on Tumblr


Long Time, Some Progress

My apologies for not posting for a few MONTHS! Yikes! School and business ownership have completely taken over my life.

Yes, you heard me. Business ownership. Yes, I’m crazy. I’ve mentioned on here before that I have thought about using my costumes to start a princess party business, and me and my long time best friend finally did it. We officially opened for bookings on May 5th of this year (Revenge of the Fifth for all my Star Wars fans), and finally had our first party in July with the addition of our Snow Sister characters.

It’s a bit surreal having people coming to you asking to hire them when you’re not even out of high school. Or writing a paycheck to your brother. Or just attending business meetings at your county Town Hall. It’s awesome, but sometimes really odd to think about.

IMG_8246
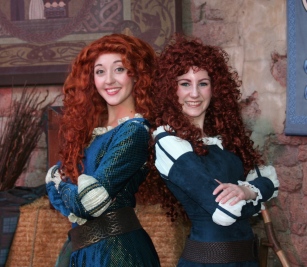
So here’s a bit of an overview of what all has been going on since I last posted:

In June I had the wonderful privilege of attending Star Wars Weekends in Disney World to meet up with some of my AMAZING friends I have met through Instagram. I will have a big post about that sometime soon.

IMG_6989
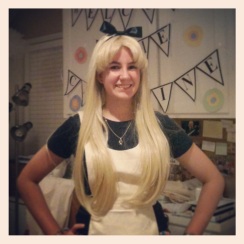
I also found a wig for Merida, thus completing her outfit. I also finished Ariel’s “Kiss the Girl” dress and Elsa/the Snow Queen, bringing my costume count to five (including Rarity).

After the addition of our Snow Sisters, our business promptly took off, eliminating any weekend time I previously had for sewing. I haven’t worked on a major project since Elsa in July, and I miss sewing terribly. I have a number of projects planned for my Christmas break that I’m super excited about.

IMG_0213My mom also surprised me by taking me and my business partner/best friend to Disney for my birthday at the beginning of October for Mickey’s Not So Scary Halloween Party. It was so amazing, so I’ll have a big post on that in the future too.

I’ve been catching up on my blogging and hope to never leave you hanging with an extremely long gap again. Here’s a glimpse of some things coming in the next few weeks:

  • My final Merida wig and where to purchase your own
  • Merida cosplay pictures
  • A detailed walkthrough of my Ariel costume and pictures
  • A detailed walkthrough of my Elsa/Snow Queen costume and pictures
  • Background and information guide on grommets and eyelets
  • My adventures at Star Wars Weekends and Mickey’s Not So Scary Halloween Party
  • My future Disney plans

My goal is to have a new post every 1-2 weeks. We’ll see how long it lasts, but I’m stocking up on posts now so that hopefully I can stay more consistent.

Thanks for hanging in there!

Taria

“A dream doesn’t become reality through magic; it takes sweat, determination and hard work.”

Colin Powell

Merida Progress 3: Finished!

This is the third and final post on my Merida dress. Part one can be found here and part two is here

As the title says, this post is my third post about my Merida cosplay. I finished Merida back in the beginning of April but didn’t get a chance to do a final progress post about her. As of this moment, I am still searching for the perfect wig for her (more on that later), but I have a few pictures of the finished dress.

I left off in my last post after I finished making the blue bands that go over the cream parts of Merida’s sleeves (you can read about that in my Merida post #2). After I had all 14 bands, I pinned them on the sleeve portions to figure out where to sew them down. Three bands were pinned on each of the top sections and four on each of the elbow sections. I pinned the pieces, held the piece on my arm where it would end up, and looked in the mirror to see if I had placed them correctly. After several adjustments, I finally had them right and sewed them down individually so they wouldn’t shift when I sewed the sleeves together.

Photo Apr 10, 6 06 11 PM

After that was all finished, I assembled the sleeve pieces, but I didn’t sew it into a tube shape quite yet. I knew that the ruffle around the hand portion of the sleeve would be a lot easier to work with if I attached it before sewing the tube shape. To start off, I took two long strips of chiffon about 2 inches wide, folded them each in half, and then gathered one side with two long, straight stitches. Then, I cut two 2 1/2″ strips of my blue fabric that were the width of the bottom of the sleeves.Photo Apr 12, 5 37 28 PM

With the sleeve laying right side up, I laid the piece of chiffon upside down on top of the right side of the sleeve, so pretty side of the chiffon pointed toward the top of the sleeve and the raw edges aligned with the raw edges of the sleeve. Then, I put the 2 1/2 inch strip of blue fabric on top of that, WRONG SIDE UP. The picture shows the sleeve before I put the blue strip on top of the chiffon, but this should at least give you the right idea.


Photo Apr 12, 6 30 22 PM


After the chiffon and two layers of blue were sewn together, I flipped it all around so that the chiffon now pointed in the right direction and the blue strip that was facing wrong side out was now right side out on the back of the sleeve. After that was all finished, then I sewed the sleeves together to make the tube shape and then attached them to the dress.

The last major hurtle in my way with this dress was the neckline. To finish the neckline, I knew I needed a facing. For those that don’t know (it took me a few months cosplaying to figure it out), a facing is where you cut a piece of fabric that has exactly the same curve as your neckline. You sew it to the neckline with the right sides together so that when you flip it right sides out, you have a finished neckline. I’m not going to get into how to put in a facing here, but a google search of “Make a neckline facing” brings up tons of great sewing blogs that can help you.

My neckline by this point didn’t follow the pattern neckline because I had raised and cut and altered it so much, so I knew I would need to trace my neckline to make my own facing pattern. I traced my neckline onto freezer paper (any paper works, I just have a huge roll of freezer paper) with the v-slit and made and installed the neckline facing and under-stitched the facing (again, Google can explain), thus finishing the edge of the neckline.

Photo May 25, 3 38 38 PM

I knew that my method of adding the ruffle that I used on the sleeves wouldn’t work on the neckline because of the v, so I just finished the edge first then added the ruffle afterward. I gathered yet another long piece of chiffon along with a rectangle piece that I used under the v. I sewed the gathered rectangle piece to a piece of my cream cotton so that all the gathers would stay in place, I then sewed the rectangle to the middle of the long gathered strip so that they were connected on the inside. I pinned the gathered chiffon to the neckline and topstitched it on, sewing all the way through the neckline so that stitching showed on the outside. No one notices anyway. I did have to go back and open out the facing and sew the chiffon down one more time to just the facing (no stitching on the outside of the dress) because the chiffon kept wanting to flip outward at my shoulders.

Photo May 25, 3 38 56 PM
Two of those blue threads are the gathering threads, one is the topstitching thread, and the one closest to the bottom is the stitch that holds the ruffle down to the facing. My serger didn’t like that cotton rectangle once it was sewn to the dress, so the inside looks uglyyy.

Photo May 25, 3 40 21 PM

While I was working on the sleeves, I began the process of slowly hand sewing around holes that I punched in the back of the dress to lace the dress. I didn’t have any good grommets on hand at the time, but I still wanted to have the dress lace up, so I decided to hand sew around the holes. I had some eyelet pliers that were terrible at putting in eyelets, but the punch function on them worked pretty well, so I punched the holes and then hand sewed around them. It was actually really relaxing and fun to do while watching a movie. I miss hand sewing (until I do a cosplay that requires a ton of it and I’ll never want to hand sew again *ahem* Elsa *ahem*). In all, there were 40 hand sewn holes, but I’m extremely happy with the way they came out. A much more natural look than if I had used grommets.

Photo May 25, 3 40 51 PM

I hand sewed in a modesty pannel into the back of the dress, which is essentially a rectangle sewn in behind the laces. Super easy, cut 2 rectangles, sew around them right sides together leaving a little hole, flip right side out, and then I topstitched around the whole thing and hand sewed it behind the laces on one side, the other side is loose.

And that was it for Merida…except her wig, which I am still struggling with. I tried twice to get New Look’s Diana 3 in Fire Red, but both times it was out of stock. So then I tried a wig from Amazon, but the original picture online was very over-exposed, so the wig was too dark. So I’m back to square one and after spending $15 shipping my dark wig back to the UK, I’m scared to buy another one. Grr.

So that’s all for Merida for now! I’ll be sure to post after I get my wig and have a photoshoot. In the meantime, here’s a picture of the full dress from the day I gave my presentation on the historical accuracy of Brave.

Photo Apr 16, 3 25 50 PM

Thanks for reading!

Taria

 “The only place success comes before work is in the dictionary.”

Vince Lombardi

Merida Cosplay Progress

Sorry about the super long post! I’ve had some technical difficulties lately so my efforts to post more regularly were postponed due to the postal service (see what I did there :)

In my last post, I talked about my current Disney Cosplay, Merida from Disney Pixar’s Brave. I am making the dress to accompany a research paper on the historical accuracy of Brave, which at this point is fully written turned in. I will post that here later this week.

I have come to realize that finding the perfect fabric for Merida is quite the process. I finally decided to make my dress out of microsuede, which is a man-made polyester suede-like fabric. You’ve probably seen it before in the form of furniture slipcovers.

I found some microsuede online from Big Z fabric. The fabric was on sale for $7 a yard. That was a really good deal to me after looking at other prices, even of other types of fabric.

After I received my sample, I decided to order 10 yards of the fabric, 7 yards for the dress, and 3 to make extra “skirt inserts” called godets for an extra full skirt, something I’ve never tried doing before, but I decided I wanted a fuller skirt than I got using my pattern.

Long story short, Big Z ended up with our old address and the postal service took 2 weeks to forward the fabric to our new address. So in all, getting fabric for Merida took about a month. Eesh.

In the meantime though, I was able to work on a few things. I cut out my Merida pattern again with a thigh length skirt to use as a practice lining. I raised the neckline and got that all figured out… after I seam ripped out the pattern pieces that I stupidly sewed in incorrectly. I put the side back piece in the front and the side front piece in the back. Needless to say it didn’t fit at all, and after 10 minutes of staring at it I finally figured out what was wrong. I hate stupid mistakes. XD

I also painted something I’ve been meaning to paint for some time. I can’t reveal it yet, but I will post it here when I can. In the meantime, here’s a picture of the colors I used. :)

Photo Mar 23, 9 33 02 PM

After I finished painting, I had a little time so I decided to cut out a circle skirt. I’ve been wanting to make a Minnie Mouse inspired skirt for a few months, so after a trip to Joann’s with my bestie, I impulsively splurged and bought the fabric. I don’t regret it.

So my cut out skirt is now hanging in my closet aka sewing room waiting for me to finish it. It will be a few weeks before I can finish it due to Merida taking all my time.

Photo Mar 23, 11 33 59 PM

Speaking of Merida,

Photo Mar 27, 10 22 46 PM


After my fabric arrived, I was able to cut out my entire dress one evening in about 4 hours. There was a bunch of fabric to tackle, so it took longer than my prototype! I also ended up with at least 4 yards of extra fabric that I can do some fun stuff with.


I remembered to take better pictures of my fabric cutting method this time. I discovered that if you stick the pins down into the carpet at an angle, the fabric stays down. If you ever try this method, you will see what I mean.

Photo Mar 27, 6 09 27 PM

So I got the whole dress cut out and then I needed to figure out how do do my godets. Basically, I needed a pattern for a pizza slice shaped piece of fabric, I just needed to know how big to make it.

When you put a godet into a skirt, you sew the seam part of the way, and then you add the triangle of fabric so your skirt is more full.

You can google more about godets if you’re still confused, but hopefully once you see mine, you’ll understand it a little better.

Photo Mar 27, 8 28 52 PM

First, I taped together two long strips of my freezer paper I use for making patterns so that I had a big piece of paper to make my pattern out of. Wrapping paper works well for this as well. I laid the paper out on the floor and put my front and side front pieces on top of it. To figure out the size of my godets, I laid my front and side front pieces so that the bodice sections matched up. I just matched up the notches in the pattern and worked my way down the dress until I got to about thigh length down. Then, I spread out the skirt sections until I got the side front piece spread out as much as I wanted, in this case, I only wanted it to make a right angle with the front piece so that my final skirt would be a full circle. You can look at the picture to see what this looked like. I just sorta winged it, I had never done this before. Basically, you’re figuring out how big you want your triangle pieces to be.

At the place where the front and side front sections intersected, I put a mark with my white fabric chalk so that I would know where to sew in the triangle later. I put a pin at this point through both layers of the fabric and the freezer paper and then pushed the pin into the carpet to secure it. Then I pinned the skirt panels at a few points again through the fabric, paper, and carpet so that it all stayed out. Then I used a pen and traced the triangle made by the skirt panels onto the paper. I did this very roughly. I also roughly drew a curve at the hem to close off the triangle. I then cut out my triangle pattern, folded it in half, and evened it out. I used this pattern to cut out 4 triangle pieces.

Photo Mar 27, 8 30 55 PM

Once those were cut, I serged the edges of all my pieces with my serger. Seeing all the pretty edges makes me happy. :)

Photo Mar 29, 10 13 00 AM

Then I sewed all the pieces together, but I made sure to stop sewing at the marks I made at thigh level between the front and side front pieces and the back and side back pieces. I sewed the side pieces entirely together. Here’s a picture of what that looked like with everything all spread out before the godets were put in. So you can see the side pieces are sewn completely together and the rest stop at around thigh level.

Photo Mar 29, 2 29 33 PM

After the pieces were sewn together, I put in the godets. I looked at this tutorial by Fashion Sewing Blog TV to figure out how to do it, and they all came out really well!

I was pressing seams on the dress for a good hour. This fabric is so stubborn that you have to iron the seams down on the front and the back to get them to lay semi-flat. It looked much better with them pressed though.

I traced out the neckline of the dress and cut it out twice of some scrap fabric to see if I could make a clean neckline without having to line the dress. The facing pattern that came with the pattern didn’t work at all even with the regular neckline, so I knew that especially with the raised neckline I would have to make my own facing. A facing is a piece of fabric that is cut with the same curve as a neckline to help hem the curved edge. You can google “sewing a neckline facing” for more information, but they’re completely necessary to get clean edges on curved pieces. This was one of the skills I was missing when I tried to make Ahsoka, and so I couldn’t get the armholes hemmed properly.

Anyway, the traced practice neckline worked really well, so I need to do that again for the real neckline and that should work. Cross my fingers. :)

I started on my sleeves the other day. You can read all about my sleeve pattern drafting on my previous post. I’m following Angela Clayton‘s method for my Merida sleeves. You cut out the basic sleeve pattern out of cotton and then put gathered chiffon fabric on top to create the “poof.”

Photo Apr 03, 10 14 56 PM

I gathered the chiffon using a long straight stitch on my machine. When I first started, I only used one line of stitching per gathered side and the gathers turned out bigger and more like folds. So I pulled out the gather and stitched another line of long straight stitching to make softer gathers. Then I pinned the gathered chiffon onto my cotton sleeve piece. So prettyyyyy. After it was all pinned, I stitched the chiffon directly to the cotton and then serged the edges so that the chiffon wouldn’t fray.

Once all four sleeve pieces had the chiffon on them, I started on the little blue strips that Merida has around her sleeves. I experimented with folding a piece of fabric in half right sides together, stitching it, then turning it right side out, but this method didn’t work because of the thickness of my fabric and the length of the strips, so I went with plan B. I cut 16, 5 inch by 1 inch strips and serged the edges to prevent fraying. I later found out I only needed 14 strips since Merida’s top sleeve portions only need 3 each instead of 4. I also wish I had made about 6 of them around 7 inches long for safety. But, they worked out.

Photo Apr 06, 6 43 51 PM

I folded the edges of the strips so that they met in the middle, right side out. I pinned the sides in as best I could until all 16 looked like the picture. Yes, my hand was cramping quite badly. But I watched Captain America while I did it, so it was bearable. I ironed the strips and removed all the pins except the two in each end to make sure that the folds stayed put.

Photo Apr 06, 8 02 17 PM (1)

After they were all ironed and the pins removed, I hand stitched the two ends together without catching the outer layer of the strips. This way, no stitches are visible on the outside of the strips. A successful experiment, to say the least. :)

Front and back of two of the strips.
Photo Apr 10, 5 29 19 PM
All 16.

That’s it for now! The dress will be finished by this Wednesday April 16, so post #2 will hopefully be up next weekend. I hope this post helps any aspiring Merida cosplayers out there! Feel free to ask any questions! :)

Just Keep Swimming!

Taria

“A dream doesn’t become reality through magic; it takes sweat, determination and hard work.” 

Colin Powell

Cosplays in Progress!

Well my promise to post about 2 weekends ago didn’t go through as planned. Sorry about that…

Just as a notice, this post is longer than what I usually post. I’ve been trying to figure out how to improve my blog, and I have found I really enjoy reading cosplay blogs that really go into detail about how they make their costumes, so I’ve decided to try that here! Let me know in the comments if you like the detail or if you’d rather me stick to a shorter cosplay overview. I will continue to refine my blogging style over time as I gain experience, same with cosplay. :)

20140211-234102.jpg

I spent several hours two weekends ago trying to drape a blouse pattern on my dress form for my secret Disney cosplay. The draping attempt was kinda unsuccessful. Pattern draping is where you take a square piece of fabric and pin it at certain places on a dress form to create a pattern. This involves creating the darts, side seams, arm holes, and neckline. Sooo much more difficult than it looks! Needless to say I didn’t post because I didn’t really have anything to show. I got really frustrated, so I kinda shoved it aside. Needless to say I bought a blouse pattern during a $1 pattern sale, so I’ve kinda ditched the draping thing for now.

This past weekend was extremely productive and made me really happy. Love it when things go well in the cosplay world. ;) I started on yet another Disney cosplay, though not the secret one I mentioned 2 weeks ago! Instead of holding you in suspense, I will go ahead and share who it is.

Merida from Disney’s Brave.Photo Feb 16, 5 21 16 PM

I just found out two weeks ago that I am going to be doing a research paper for my history class. I decided to research the dress and life of Medieval ladies. That topic evolved into The Historical Accuracy of Brave, which I will post here when it’s finished if y’all are interested. :) I am making Merida’s dress to go with my presentation. Her dress is pretty historically accurate, along with the majority of things seen in the film.

So! Merida progress. As always, I started by making a prototype out of bed sheets. My mom gave me a ton of old sheets during the move, so I have loads of them. Even when working with patterns, I like to make sure that all of the little details will work out right in my final product. Muslin is a good cheap alternative if you don’t have a big supply of sheets.

20140211-235226.jpg

Here’s the pattern I’m using. On an online sewing blog, I read about a lady who copies the front of the pattern envelope and then tapes the copied picture to a bigger manilla envelope so that you can keep all the pattern pieces and any copies you make inside the bag all together. I traced the entire dress pattern onto freezer paper. Freezer paper comes on a roll like aluminum foil and it’s basically a big roll of white paper with a plastic backing. You can use parchment paper to trace your patterns onto as well, and that would probably even be better because you can buy it pretty wide. I use freezer paper because I bought a large roll of it for stenciling, so I have tons of the stuff to use up. Tracing the pattern makes it where if I need to make modifications, I haven’t cut up my original pattern.

20140216-163421.jpg
You can see all the pins that are holding the patterns and fabric down to the carpet while I’m cutting around the pattern.

When I cut fabric out, I will usually use my rotary cutter and mat if it’s small enough like a bodice or sleeve. For the dress, I had to lay it out on the floor. Something I do when I cut things out on the floor: if you have carpet, lay your fabric down and pin in straight to the carpet. Stretch the fabric all out flat and put pins all around, then put the pattern on top where it needs to go and put your straight pins straight through the pattern and fabric and also down into the carpet. It doesn’t harm the carpet one bit and it keeps everything from sliding around, not to mention it’s a lot faster than sliding the pins down and back up through the fabric alone and hoping you don’t catch the top of the carpet.

20140216-162633.jpg

As usual, I found something that needs altering from my prototype. In this instance, the neckline on the pattern is  too low cut for Merida. Glad I caught the problem now rather than later! The neckline looks weird in this picture because the strip of fabric on the outside needed to be folded and sewn to the inside, which I hadn’t done yet. When I traced my pattern onto the freezer paper, I also added a good 8 inches or so of length to each piece just to make sure the dress would be long enough. That was probably a little too much, but it allowed me to hem the prototype with a train in the back, which is super fun to walk around in.

20140216-164215.jpg
The eyelets aren’t crooked, it just looks that way. When I do the real dress, There will be a lot more lacing holes, so the puckering will go away.

I tried out a new way of putting eyelets into the back of a dress. It’s probably very unconventional, but it works for me. That’s what I love about sewing. If you can get it to do what you want, it doesn’t matter how you do it.

I didn’t feel like using any of my white canvas, so I used red canvas in the back of the dress since it’s just a prototype. I sewed up the back of the dress like I was going to put a zipper in. I folded back and ironed the remaining opening and then stitched strips of my canvas into the folds. I put the eyelets through the fabric and canvas, which made a thicker surface for the eyelets to hold on to so the cotton doesn’t pull as much. It actually worked really well! I either have cheap eyelets or junky eyelet pliers because only 1 in about 20 eyelets actually goes in correctly. I had to cut two eyelets off my pliers while I was trying to put them in because they got stuck on the pliers. Super frustrating. I ran out of eyelets while doing the back of the dress, so hopefully a different brand of eyelets will work better.

I’ve spent more hours than I can count trying to draft a pattern for Merida’s sleeves. Her sleeves are made up of 4 parts: 2 the same fabric as her dress, and two of a light cream colored fabric. In the movie, Merida wears a full under tunic called a kirtle that was most likely made of linen, and that is the cream that sticks through the slit sleeves and neck of her overdress. For comfort, look, and money purposes, I’m making  a “mock underdress.” I’ve found that mock sleeves tend to look better as far as Merida cosplays are concerned because they really hold the poof shape.

When I started with the sleeves, I turned to Angela Clayton’s Cosplay and Costumery blog. She is an amazing cosplayer who cosplayed Merida a few months ago. She posted her measurements and outline for her sleeves on her blog, so I started out with those and drew them out on my freezer paper. She had a few weird measurements that give her sleeves a particular shape, however I couldn’t make some of those measurements work. I did use her measurements and outline as a basic guide and they helped a lot when figuring out my pattern!

After I traced out the design on freezer paper and cut it out, I cut out the four pieces on some scrap fabric and sewed them all together temporarily with a long straight stitch on my machine so that it would be easy to take apart. I then sewed the temporary sleeve into the dress and figured out what modifications I needed to make. There were a bunch! I used a removable fabric marker to mark where I wanted certain parts to come on my arm while I was wearing the dress. Then when I took it all off, I knew how to fix what needed to be fixed.

Photo Feb 16, 9 42 23 PM
The purple marks on the right show where the seam lines are in the sleeve since you can’t really see them in the picture alone.

I started by fixing the shape under the arm at the top of the sleeve. I learned why the curved shape of sleeves is important. Sleeve patterns have a particular curved shape that allows for there not be be a bunch of fabric under your arm. Think of it this way: if you sew a plain tube of fabric to the arm hole of a dress or shirt, all the fabric will be stretched out when your arm is stretched straight out to the side. However, when you put your arm by your side, you’re going to have fabric bunched up under your arm. To fix that, you curve the top of the sleeve.

Photo Feb 13, 11 32 22 PM
Pattern sleeve on the top, my failed attempt on the bottom.

Instead of trying to wing it, I decided to just pull out the sleeve from my dress pattern and trace it to use. I traced it onto my freezer paper and cut it out of some more scrap fabric. I temporarily sewed it into the dress and then used the fabric marker to mark where I wanted to cut it to be Merida length. The picture to the right shows what I ended up with. The new pattern with help from the dress pattern is on the top, my junky first attempt is on the bottom. The bigger curve eliminates the puckering under the arm.

Edit!!! While the above information is true, I wish I had stuck to my old pattern, and here’s why. 

If you look closely at the Merida in the Disney Parks, you can see that she has a bunch of extra material under her arms. This is important because…you need it to raise your arms up. While my sleeves on the final dress work, I have severely restricted arm movement. In conclusion, I’m going to be remaking my sleeves to have much less of a curve to them. In this instance, the extra material is ok. So don’t use a super curved pattern because it will restrict your arms. 

So, I had a top sleeve pattern, now I needed to fix the rest of the sleeve. I started by evening up some of the uneven measurements from Angela’s pattern that didn’t work for me. I made the middle sleeve poof centered on my elbow and fixed the pieces above and below it accordingly. This took the longest time of anything, I lost count of the hours and Clone Wars episodes I watched while refining this part. Cut fabric, sew it together, try it on, mark it, rip it all apart, and do it all again until you get it right. There is always one “doom” component to every costume it seems. Before it was the Alice Petticoat of Doom, now it’s the Merida Sleeves of Doom, though the petticoat took much much longer.

So I finally got a pattern! Whoo! The four parts turned out like this:

Photo Feb 16, 10 19 49 PM

Then I decided to experiment with the poof part of the sleeves.

I’m using Angela’s method of poof which involves gathering a layer of chiffon and sewing it to a flat piece of fabric. I didn’t cut a wide enough piece of chiffon, so that’s why it’s not as gathered toward the ends of the piece. When it was all gathered, pinned, and sewn down, the poof turned out like this:

Photo Feb 15, 12 32 30 AM

It turned out so pretty I just wanted to stare at it and feel all the ruffles! You would too if you’d been sewing and seam ripping the same pattern over and over for the past few  days . . .

I added the same gathered chiffon to the elbow section of the sleeve and sewed it all together. There are little rectangles that go over the gathered sections, but I didn’t feel like adding them at this point. I was just ready to have a sleeve!

So finally, all assembled, this is what my sleeve looked like! Yes, it has pattern markings in permanent pen on it, but I was too sick of these sleeves to care. I didn’t feel like cutting out another piece. Lazy, I know, I know. But it’s a prototype, so whatever. :)

Photo Feb 15, 11 54 11 PM

And the full dress as it stands!Photo Feb 15, 11 53 19 PM

This picture was taken at night right after I finished the sleeve, so it’s a horrible picture, I know. But it gets the idea across for now. I’m also wearing a long sleeve white shirt because the neckline is much too low for my comfort. I went out and grabbed my Dad’s bow to take the picture with. My bow is white, so I figured his would look better. :)

I still need to buy real fabric for Merida, but I decided to do her so quickly, I haven’t really had time to research and look for what kind of fabric I want. I’m thinking velveteen or possibly wool suiting, but I’m not sure at this point. I will probably switch over to my secret cosplay for a few days until I get my real fabric since this is all I can really do to Merida at this point.

That’s all I have for now! What do you think of this blog style? Like it? Too long? Too detailed? Not enough? Let me know via social media or the comments what you think! Writing this post has given me a feel for some things I wish I had taken pictures of, so I will remember to take more pictures as the dress progresses.

Hope you enjoyed it!

May the Lord as the Force Be With You!

Taria

“Do everything you do for the glory of the One who made you because he made you to do every little thing that you do to bring a smile to his face and tell the story of Grace with every move that you make in every little thing you do.” 

Stephen Curtis Chapman, “Do Everything”

What Have I Been Up To?

Wow! What a busy past few weeks! I hope you all had a wonderful Christmas and New Year!

Where have I been? Well we just finished moving to a rental house! I have a huge closet that is my new cosplay space for the time that we’re here. I have been busy packing and unpacking these past few weeks, so I haven’t been able to sew much!

That being said, I have made 2 things since I last posted!

photo-1
Yes, that is Clone Trooper bedsheet fabric. :)

The first was my first corset that I started making during the beginning of my Christmas break. I used a purchased pattern, but I took out the side zipper and changed it to eyelets in the back so that it laces. I used zip ties for boning and it worked pretty well! I love the way the corset feels when I wear it. The pattern was good for me to learn basic corset construction so I will know how to draft my own patterns for things in the future. :)

photo 1-1
Who could this be for? ;)

The second thing I’ve been working on is a mockup top for my next cosplay! I’ve decided to keep it a surprise, however I will say that it is Disney! I purchased my fabric earlier this week for $22! Very very excited about the low price of this cosplay! My wig should cost about $45 and then I might need a few other little things, but all in all this cosplay is going to be less than $80! Very happy. :) As an added bonus, this cosplay should only take about 4 weekends or so to make! That’s pretty darn fast for me because of the demands of school! Haha. When there are no petticoats of doom involved, cosplay can be pretty quick!

photo 3-1
The work I did on the mockup blouse  before the move.

I’m trying to modify my Alice bodice pattern for the blouse top my character wears, however I think I may need to draft my own pattern. The way the darts were made on the dress bodice pattern just weren’t meant for a blouse! I made a prototype, but it wasn’t quite working. I did alter the neckline on the dress pattern to match my character and it turned out really well, so yay!
I did make a pretty successful sleeve pattern by modifying my already modified Alice sleeve. I changed it from short to long sleeve and I’m pretty happy with it! I’m currently tweaking it a tiny bit more and then it will be good to go. Yay!

photo

My blouse has also been my first time experimenting with a rotary cutter! I asked for one for Christmas as I have seen many seamstresses using them. Basically, its a round blade that you use to cut out pattern pieces on top of a mat: no pins required! It makes cutting out fabric go so much faster, so I have really enjoyed using it! Cuts down on hours of time!

photo 2

I will keep you updated as updates are available! I just finished unpacking my sewing materials and am looking forward to a new cosplay space while in the rental house! I will have some time to sew for the first time in forever this weekend (anyone catch that reference?), so I will try and do a quick update post Sunday evening so you can see what I’ve done. :) I have tons of awesome stuff planned for the coming months and a few big surprises! Can’t wait to share all about it!

Just keep swimming!
Taria

I’d rather attempt to do something great and fail than to attempt to do nothing and succeed.”

Robert H. Schuller

Alice Costume: Finished and News!

Wow! What a last couple of months! I apologize for my bloggie silence, but I have been extremely busy as you will see. But, I also have some very exciting costumimg news to share, so keep reading to find out. :)

Well, first off, Alice is completely finished! In total, she took about 3 and a half months, working solid during the summer and weekends during school. I barely finished her a week before my convention. Overall, it has been such an incredible learning experience for me, and I am very excited to move on to an even bigger cosplay next!

The biggest time consuming part of Alice was the petticoat. I wanted to use full circle skirts just like the Disney Park Alice that I was copying. I just don’t like the way netting looks when it peeks out under a skirt. I had about 7 circle skirts in that petticoat, each with about 5 hours of time put into the hem. Yeah, you do the math. It took about two months and was the biggest part of this costume. I did end up using some netting to round out the top half of the skirt, but you can’t see it.

The hardest part of Alice’s costume I would say was the pinafore, followed closely by the collar. I created my own pattern for the pinafore, which is still a tricky thing for me! The biggest issue with the pinafore was the seam allowances and lace. Sounds like a simple thing, I know, but trust me, getting all that lace on the edge is super tricky! You have to pin the lace down to the top side of the pinafore, loosely stitch the lace in place with a temporary hand stitch called basting, then pin the back side of the pinafore on top of that. So when you’re stitching everything together, you can’t see the lace. There were numerous places where I had to take the pinafore apart because I stitched too much lace into the seam, or the stitches didn’t catch the lace at all. I ripped out seams and re-stitched parts of the pinafore so many times I lost count.

I modified a store bought pattern for my collar, but with all the modifications I had to make, there weren’t many store bought bits left in my final pattern. The tricky part about the collar was again, the lace. In addition to the lace problem, making sure that both collar halves are completely even is much more difficult than it sounds. If you stitch the slightest bit different from one collar to another, it shows. I am thinking about remaking my collars in the future for size reasons, but we’ll see. :)

Now on to my news! I attended my first sci-fi convention during the second weekend of November. It was an interesting experience (more on that in a separate post . . .), but it was super fun.

Some of you know and I may have mentioned that I was thinking about entering the costume contest at this convention. I figured, hey, first convention, first cosplay, first big sewing project, why not go really crazy and enter the contest?! I didn’t have the slightest motivation of doing it because I thought I could win anything, but I just thought it would be a super fun experience. I started to second guess my crazy scheme later, but I did muster up the courage and decide to enter.

I was looking up different random tutorials online and came across a website called “And Sewing is Half the Battle” that had a page called “How to Enter (and Survive!) a Cosplay Masquerade.”  On that page, they had some super amazing tips about entering a costume contest that I wouldn’t have previously thought about. One of the things I learned on there was the importance of having reference pictures of your character so that the judges can see how accurately you reproduced the character’s outfit. I hadn’t really thought about doing that, so I made sure to print out some pictures to take with me, showing all the details of the Disney park Alice, who was my model. I also printed out a page that detailed what parts I had in my outfit, what parts I used a pattern for, you get the idea.

The second thing the website mentioned was preparing a skit, audio recording, or something to say while you are in front of the audience. I learned and saw this a little bit on Heroes of Cosplay (the one thing I can give HOC credit for), but I hadn’t given a skit a lot of thought as to what I would do. The convention website said that there would be no open microphone, but they could play audio off a CD, so I prepared an audio clip 30 seconds long from Disney’s Alice in Wonderland to play and act to while I was on stage.

It was a super small convention. I mean, really small. There were, I believe, about 11 contestants, including me. We all went back to a room an hour before the on stage part of the masquerade to do the workmanship pre-judging. This was optional, but I really wanted feedback on my costume, so I decided to do it. Yeah, I thought I was crazy too.

I showed the judge my portfolio of pictures and showed him all the parts of my costume. I asked specifically for feedback about my documentation, and he said it was excellent. He also said my costume was one of the best reproduction jobs he had ever seen. I was so unbelievably happy.

There were so many other amazing costumes in the room with me. One girl made armor, another girl had body paint, another girl had a corset and hand painted skirt. I was talking with them about costuming while we were waiting, and I learned a lot of great cosplay tips!

While we were chatting and waiting, about 30 minutes before we were to go onstage, one of the heads of the contest told me they couldn’t play my audio. Okkk, time for plan B, as soon as I come up with it…

I was 4th in line to go onstage. We lined up outside the room were were going to be presenting our costumes in, and I just kept running movie lines in my head thinking of what on earth I was going to say. See, watching the movie 30 times pays off. :) The room was small enough that I could speak and be heard without a microphone. In my best Alice accent, I asked if there were any unbirthdays in the room and got a few hand raises. I asked if it was anybody’s birthday, and when no hands were raised then I told everyone that its everyone’s unbirthday. Then I did a curtsy and said I was going to find the white rabbit and skipped out. They loved it, phew!

When it came time for awards, they announced the Judge’s favorite, workmanship award, best beginner (never won any awards), best journeyman (won an award before), and then lastly, Best in Show. I still wasn’t expecting to win, but I still had hopes. One by one, all the awards were handed out leading up to Best in Show.

I was shocked when the called my name. Shocked. I just did the contest for fun. Once the shock wore off and the contest was officially over, I started crying. I was just stunned. I mean, it was my first big sewing project and convention and wig styling and dress and petticoat and everything else. I hand it all to whoever wrote that article on “And Sewing is Half the Battle” because it was my documentation that helped the judges to see how accurate my costume was. The details pay off. :)

photo 3

I’m going to bring this story full circle and tie it in to what the theme of my blog seems to be becoming. Never give up on your dreams. Go hard after the things you love. There were sometimes I just wanted to give up on Alice. Little things still turned out not quite the way I originally envisioned them. But if I had given up and deemed my costume not good enough for the contest, I never would have even had the chance to win.

I don’t know where I am taking my costuming in the future. My convention experience was such that I don’t know if I will be going to back to a convention for several years, if ever at all. I will delve more into that in another post as it is a long story. My prayer from the beginning of this journey was that the Lord would use my costuming however he wants to. The Lord closed the convention door for me, but I believe he has plans to use my talents in other ways that I may not know yet. I am learning to be a cosplayer without going to conventions. I hope to possibly create more Disney costumes and start a party company in my local area in the next few months. I hope to join the Rebel Legion once I turn 18 and share my costume and Star Wars love as well as God’s love with those I get to visit as part of the Legion. I am beginning to possibly consider fashion design as a career. Whatever I end up doing, I know that God has a plan for everything, and that even my costume love is a part of his plan, wherever it takes me.

Many thanks for reading my ramblings. I hope you take something away from my experiences!

May the Lord as the Force be with you!

Taria

“Our greatest weakness lies in giving up. The most certain way to succeed is alway to try just one more time.” 
Thomas Edison
“Big shots are only little shots who keep shooting.”
Christopher Morley

Meet Fangirl Robyn!

Fun-and-Fandom-Post-Collab-with-Caroline-Image-web

What a month since I last posted! Super busy, mainly with final Alice preparations! I have lots of news to share about my now COMPLETED Alice in Wonderland cosplay, which I hope to share with you soon!

In the meantime, I had the privilege to collaborate a post with one of my good online friends, Robyn. Robyn is a graphic designer and fangirl, and I’ve gotten to know her over the past couple of months. She is a “veteran” fangirl, and has many awesome fandoms! We came up with 6 questions to ask each other, so her answers are posted here, and my answers are on her fandom blog, appropriately named “Fun & Fandom.” Without further ado, here is Robyn!

1) What’s your favorite Star Wars movie and why?

I LOVE all the Star Wars movies, and having to pick and absolute favorite would be like a choosing from your children. They are all my favorite. There are ones I like watching a little more often than the others, mainly because I watched certain ones a lot as a child. The ones I probably play most often are Return of the Jedi, and Revenge of the Sith followed by Empire Strikes Back, Attack of the Clones, A New Hope and The Phantom Menace depending on what mood I’m in. Since the Blu-Ray set came out I tend to watch the movies in order more now than before.

2) What are all your fandoms?

Star Wars, Star Trek, Babylon 5, Indiana Jones, Harry Potter, Lord of the Rings, Marvel (starting to get into it), Seaquest DSV, Bones, Buck Rodgers, Classic Battlestar Galactica, Sailor Moon, Home Improvement, Bewitched, I Dream of Jeannie, Family Ties, Parenthood, and I’m sure I’m missing a few more.

3) Who is your favorite character(s) from all your fandoms?

Some of my favorite characters from all of my fandoms would be Luke, Leia, Han, Anakin, Padme, Chewbacca, R2 & 3PO, Captain Janeway, B’Elanna Torres, Spock, Indiana Jones, Temperance Brennan, Agent Booth, Jeannie, Samantha and Darrin Stephens, Tim Taylor, Buck Rodgers, etc. This list is seriously really long!

4) If you could cosplay as any character who would you choose and why?

Hmm, that’s a tough one for me. I’ve never cosplayed before so if making the costume wasn’t an issue, as I can’t sew, there would be a few characters that would be fun to cosplay as. The first would be one of Princess Leia’s many gorgeous outfits, except the metal bikini! Haha. The next would be Samantha from Bewitched. The clothes from the 1960’s are really cool (I love the vintage styles) and she had some really nice outfits, so I think cosplaying as her would be fun. The last would be either Wilma Deering’s flight suit from season 1 of Buck Rodgers or Susan Ivanova’s uniform from Babylon 5. I think any of these characters would be fun to cosplay.

5) How have any of your fandoms changed or affected your life? Explain.

Pretty much almost all of my fandoms are ones that I’ve grown up with my whole life, so it’s hard to know how much they’ve really affected my life compared to if I had become a fan of these fandoms later in life. I know that many of the creators of my favorite movies and shows have really fueled my imagination and creativity. These would be people like George Lucas, Gene Roddenberry and Steven Spielberg. I think that my fandoms also taught me many things as a young child especially when my escapes from the world were sci-fi shows full of adventure, mysterious planets and various species. I feel that watching these shows and movies made me feel that different was normal, even though society is a bit backwards in that department. The values and morals many of the characters had, along with such wonderful stories, are things that I really appreciate now that I’m older as many shows aren’t like that these days. I think my fandoms have really helped shape who I am as a person, and help me connect with others who are interested in the same things I am.

6) What are your two favorite quotes?

“The Force is Forever” and “Do What Makes You Happy, and Don’t Care What Others Think,” from Demi Lovato. I also really like “Why Fit in When You Were Born to Stand Out,” from Dr. Seuss. These quotes are some of my favorites, and hold within them some words of wisdom and truth.

–Robyn

I encourage you to check out Robyn’s Fun & Fandom blog for her opinions on many of her favorite fandoms! She also has a website for her graphic design called Robyn Lindenmayer. She does wonderful work! If I ever need a designer, I know I will head straight to Robyn! You can also find her on Instagram as @robyn_designs and on Facebook as Robyn Lindenmayer and Fun & Fandom!

When we consider the blessings of God–the gifts that add beauty and joy to our lives, that enable us to keep going through stretches of boredom and even suffering–friendship is very near the top. –Donald W. McCullough

Image credits: –Star Wars PosterStar Trek CaptainsBabylon 5 CastSailor Moon Group Picture

My Review on Heroes of Cosplay

heroes-of-cosplay-logo-wide-560x282I’ve been so busy with cosplay and life I haven’t had much time to post! I’ve been editing and working on this post for quite some time, I’ve just neglected to actually post it.

Continuing with the cosplay theme, I figured I should write a review on SyFy’s show, Heroes of Cosplay. This is my opinion, but I’m going to speak my mind honestly.

I was super excited when I first heard about Heroes of Cosplay. I was especially excited to see fellow cosplayer Victoria Schmidt as a participant on the show. An interview that Ashley Eckstein did with Victoria in her Ahsoka cosplay at Dragon*Con is what first drew me in to the cosplay world a little over a year ago. When I saw Victoria’s Ahsoka, I knew I wanted to create costumes like her. I sat down and watched the first episode of Heroes of Cosplay, but I was sad to see that the show focused a lot on the competition aspect of cosplay and not as much the fun and building aspect of cosplay.

One thing I will say is that Heroes of Cosplay is good for giving non-cosplayers an inside view into the world of cosplay. It definitely showcases the stress (a little too much . . .), but it also shows the choices you have to make, the frustration over things not working out correctly, and the extremes cosplayers go to to try and make something as accurate as possible. It is inspiring to see even a small glimpse of people bringing life to characters, and it especially gives you a great appreciation for the craftsmanship and skill required to build amazing costumes. I think that that those aspects of the show are great.

Heroes of Cosplay really focuses competition side of cosplay. While I think that’s great as I have never experienced that aspect of cosplay before, I wish it showed more of how the artists crafted their costumes, and didn’t show quite as much competition drama. The way the editors frame the episodes make it seem much more like a drama show than a show about costume building.

During the third episode of HOC, I had to turn it off mid episode. The way the editors framed the episode really distracted me from the building process of the costumes.The dramatization went way over the top, and the language used and lack modesty was really disappointing to me and my mom.

I recently saw a review on Heroes of Cosplay that made me want to stand up and applaud the writer. The author pointed out the fact that HOC has been made like a reality series instead of a documentary, which I think is what I really wanted to see. I know I’ve written enough already, but I’m just going to put most of the article up here for you to read because it’s just outstanding. The article was written by Adian Vitti who is a seamstress, costume maker, and cosplayer herself. The original article is on ComicBooked.com. What Vitti describes in her article is more of what cosplay really is, not everything that is depicted on Heroes of Cosplay.

Syfy’s Heroes of Cosplay is not a show about cosplay. It’s a show about drama. It’s reality television in a comic convention setting, but the cuts and the edits, the scripts and the dialogue, that’s not what cosplay is. More importantly, it’s not what cosplay is to me.

Immediately, the show alienates the core community they’re drawing from to begin with. I fought with this for a few days. I tried to think about it objectively and forget the part that it was supposed to be a docuseries and not reality television. I’ve never really been in a situation where I’ve been able to look at a reality show that represents some part of my life that I hold dear. Project Runway, to a certain extent, categorizes some of my life in that I graduated with a fashion design degree, but it’s separated enough from me, as a costume designer, that I could look at it and see the flaws but appreciate the work within it.

The point is Heroes of Cosplay was the first time I looked at a reality show with first-hand experience on what it actually is like at the events depicted. Is this what happens when an Alaskan fisher watches Deadliest Catch? Does he have just as many issues with that show as I do with this one? Is this just what happens when all reality series are made?

I don’t know.

What I do know is this: on the surface, the show seems to be about cosplayers and the costumes they’re rushing to make before conventions. That’s accurate. But the rest of it? It’s so skewed and over-dramatized, and look. I’ve been in the same situations that they have; we all have! I’ve thought it was a great idea to start a costume two weeks before a convention, and had a nuclear meltdown when it wasn’t going according to plan. I have definitely looked like tantrum fodder out of Toddlers & Tiaras and I’ve laid on my bed, limbs outstretched and furiously staring at the ceiling in total, absolute frustration over whatever [craziness] I’m making.

Is that cosplay?

Yeah, it is.

But it’s only one part of cosplay. It’s part of the process, but it’s not every step of the way. You could have spent an hour on each of the contestants documenting the processes they went through for their costumes individually. It could have been the whole series, an individual (or pair) each episode. The pattern-making, the fabric decisions. The anxiety over whether the first muslin test will be good enough or if you’ll have to spend more time making another. The elation over cutting final fabrics and the first assembly of what you’re really, actually making. Like everything else, there’s a ton of trial and error in cosplay. There’s a lot of mistakes and unexpected problems. There’s definitely drama and over-reacting.

But there’s also successes. Not just at the end, but throughout the process. Little things that you put together and hold up and just smile, because finally. Something looks right. The little successes are sometimes the only thing that keeps you going.

Shows like Project Runway have proved that the creative process can be interesting to mass media, whether they’re cosplayers or accountants or both. It’s [frustrating] for SyFy to demean cosplay, to doubt whether the content they have is capable enough to withstand the media and therefore, must be stuffed with scripted filler to engage and add superficial drama.

I want to write about a show on cosplaying. I want to watch how other people assemble costumes, the processes they go through and the ways they differentiate from mine. I want to feel their stress and their anxiety, the worry they’re not good enough. I want to share their joy and their pride when they complete a step or see themselves in the mirror for the first time, wearing everything.

I want it to be inclusive just like cosplay is – a kind of fan appreciation that really, anyone of any skill level can participate in if they want to.

The teenager who’s just discovered anime for the first time and excitedly pieces a costume together from [her] mother’s bedsheets is just as much a cosplayer as Yaya Han, as the guy who slaves away for months in his garage studio, vacu-forming individual armor he first constructed via 3D software on his computer.

And that is why I do not like this show . . . It’s not inclusive. It makes cosplaying out to be some cutthroat competition that’s all about the prize and not also about the characters, the craftsmanship, the actual act of wearing something you’ve spent days and hours on.”

I’d love to hear your thoughts, but I hope I’ve done my part in shedding a little light on Heroes of Cosplay from my point of view.

May the Force be with you!

Taria

 
“Like everything else, there’s a ton of trial and error in cosplay. There’s a lot of mistakes and unexpected problems. There’s definitely drama and over-reacting.

But there’s also successes. Not just at the end, but throughout the process. Little things that you put together and hold up and just smile, because finally. Something looks right. The little successes are sometimes the only thing that keeps you going.”

My Thoughts on Cosplay

As I’ve been thinking about what to write about, I thought it would be fitting for me to write out my personal thoughts on cosplay since cosplay is shaping up to be a major part of my blog. I am still new to cosplay, but I thought some of you might benefit from hearing a teen’s thoughts on the art that has been getting so much media attention lately. In my next post, I’m going to write my review on the SyFy show, Heroes of Cosplay, but I won’t get into that here.

To start off, I want to say that I value modesty. As a follower of Christ, I want the way I dress to reflect Christ and the fact that he dwells in me. I’m not saying that everyone should agree with me, but this is what I believe and live by. I think that people have a right to cosplay the way that they choose, but modesty comes first in the way that I cosplay.

To explain what cosplay is for me, I’m going to make an acrostic out of the word “Cosplay” and attempt to explain different aspects of cosplay to someone who maybe has never done it before but wants to. I also hope to dispel certain myths and give an inside look into how I view cosplay, which is probably slightly different from the way most people cosplay.

Here is my small cosplay acrostic: Creative, Original, Study, Passion, Labor and Learn, Action, and Yes (don’t worry, I’ll explain that later).

C: Creative

Cosplay will stretch your creativity. It is an art form as much as any other. When you put together a cosplay, you’re interpreting a character and taking something two dimensional and giving it life. You’re becoming a fictional character while you’re in costume. The creative aspect of cosplay is so much fun to me! From picking from hundreds of thousands of characters to choosing fabrics and accessories, your options are limitless!

O. Original

Not all costumes have to be exactly as they are on the screen or page. The fact that cosplay is an art form means that you can slip some of “you” into your costume and make it your own. No two cosplays are exactly alike, even if they are for the same character. Something that I’m getting into with my upcoming My Little Pony cosplay is making a cosplay that’s inspired by a character. I’ve loved sketching out outfit designs for two of the pony characters in the show because I get to interpret the characters and their personalities in the way that I want. I love it. :)

S: Study

The better word here is research, but I needed an S, so study it is. People have asked me more than once about my costume, “Where did you learn to do this?” My only answer to them is “The internet.” So many other cosplayers and professionals share their techniques and tips online, you only have to search a bit to find them! So you want to make a corset and don’t know how? It’s online. Petticoat? Online. Style a wig? Online. Even finding patterns or interpreting the directions on a pattern, you can learn it all online. All my cosplays have involved research of some kind, some more than others, but it’s the sure way to get many of your questions answered to help you start creating your costume.

P: Passion

Let’s face it. Every cosplay starts with a character you’re passionate about. I mean, if you want to go so far as to bring a character to life, you must have some sort of love for the character, right? :) I think one of the most fulfilling parts of cosplay is seeing yourself become the character you love. To stand in front of the mirror, look at yourself, and see a two dimensional character come to life through you. It’s so rewarding and exciting to see it all happen right before your eyes!

L: Labor and Learn

This is a two parter. :) I’m going to start with Labor. To quote Ahsoka, “It’s not easy, but it’s possible.” Even simple costumes require time and money to bring to life. Now I’m not saying that every costume is long, hard, and expensive because they’re not! Some people want to have their costumes very accurate and neat and are willing to go farther and pay extra to get it right. To other people, maybe accuracy doesn’t mean as much to them and I think that’s totally great too! I’ve made a $15 two hour Ahsoka and am finishing my $200 three month Alice, so I have been both places! It all depends on what you want to do. Cosplay is for you, and you make it your own. Nobody has a cosplay rule book and dictates what is and is not cosplay. Have fun! All the time and effort you put into your costumes is so rewarding once it is all complete! :)

The second L is Learn. The best way to grow and learn as a cosplayer is just to make costumes or clothing. I first started “sewing” when I was about 5. My grandma gave me a little kit that showed you how to make little stuffed animals with a hand needle and embroidery thread. I made a skirt from a pattern with my mom to learn the basics of patterns and machine sewing a few years ago. From there, I did a bunch of little projects. I made a very simple purse with a kit from Walmart. I made little 2″ drawstring bags that were my first big trial and error project. I think I made 3 or 4 of those before I finally got it all right. I did a couple of other little things that just helped me get better at the basics.

Then I got obsessed with Star Wars. I started learning all about cosplay and wanted to make a costume for my favorite character, Ahsoka Tano. I made a very simple Ahsoka outfit for a trip to Disney and then finally got up enough courage to try and attempt a full out Ahsoka cosplay as accurately as I could. I had the basics of sewing down, but I was missing some fundamental techniques. When I tried to make my Ahsoka dress, I quickly got frustrated because (as I later found out) I was trying to do many parts of the dress incorrectly. I wasn’t quite ready for making things without a pattern.

I tucked Ahsoka aside and decided to move on to Alice. I was able to work off a pattern with few alterations, and through making that dress that I learned so many more techniques about basic dress-making than I knew before. I learned how to correct my Ahsoka dress problem through my Alice experience, and now have a better grasp on different techniques used in basic dress and bodice pattern drafting. All from making one dress! Like I said, cosplay is very much a “learn by doing” art form! So never be afraid to start!

A: Action

Though one of the fun parts of cosplay is building your outfit, it’s super fun once your cosplay is finished. You covered the costume or “cos” part of “cosplay,” now you just have the “play” left! I have never been to a sci-fi convention before, but I make my costumes primarily for wear and use for different events. Once my Alice is finished, I hope to go and read to kids at our library or bookstore, do birthday parties, or just go to a local toy store or shopping center in character just to see the reactions of other people. You don’t have to go to cons to be a cosplayer! I’m planning to go to my first con in 2 months and am super excited to get to cosplay there and make a costume specifically for the con, but conventions don’t have be all cosplay is for! After you put so much time and effort into an outfit, go flaunt it!

Y: Yes

I thought that “Yes” would be a particularly good ending to my acrostic and cosplay “novel” (I write way too much. My apologies). XD I say “Yes” because you can cosplay. Dressing up has been a love and joy of mine ever since I was little. Part of the appeal of cosplay to me is being able to dress up and not only to feel and look like the character you’re portraying, but to be the character. Though I haven’t gotten a chance to yet, the thought of putting on a dress and a wig, donning a British accent, and truly being the face of Alice in the real world to little girls just excites me. To leave behind high school homework and be a little girl in a blue dress from Britain for a few hours . . . I just can’t wait!

Where I’m trying to go with this is to say that if you don’t think you can cosplay, I’m here to tell you that you can. I never dreamed as that little girl in a lace dress pretending to be Mary Poppins that I could one day be Mary Poppins if I wanted to. Don’t just dream about it, do it! I dreamed about making a “real” Ahsoka costume all last summer, believing that I couldn’t ever make a costume like that, yet here I am doing it! If you already cosplay, don’t be afraid to dream bigger, because you never know what you can do!

Well I hope that I helped you maybe see a different aspect of cosplay than is being portrayed these days. I would love to hear your own thoughts on cosplay! Did this help you at all? Do we have something in common? Let me know!

Don’t be afraid to reach for the stars!

Taria

“When you’re curious, you find lots of interesting things to do. And one thing it takes to accomplish something is courage.”

“The way to get started is to quit talking and begin doing.”

“Somehow I can’t believe there are any heights that can’t be scaled by a man who knows the secret of making dreams come true. This special secret, it seems to me, can be summarized in four C’s. They are Curiosity, Confidence, Courage, and Constancy and the greatest of these is Confidence. When you believe a thing, believe it all the way, implicitly and unquestionably.”

Walt Disney

Alice Cosplay: Update 2

Well my Alice cosplay is still under construction! However, I have come a long way since my last update.

The pinafore shown in this picture is my prototype pinafore. I hope to have my real one finished in the next few weeks!

The blue part of my dress is all finished except for the hem! I must say, I’m very happy with it! I changed the zipper from the pattern’s centered zipper to a lapped zipper to keep my dress as identical to the Disney Park version as possible. I had never done a lapped zipper before as I made my prototype dress with the centered zipper, but the lapped one came out pretty well. The bottom is a little “not perfect,” but it will be covered by a huge bow anyways. I made the skirt length much longer than the final length because I want to do the hem once I finish my petticoat and I wanted to make sure I had plenty of fabric to work with. I figured I can always cut some off the bottom of the dress, but I can’t stick more on! I fixed the sleeve pattern so that it isn’t nearly as big and poofy as my prototype. I actually ended up shaving off 5 inches from the top of the sleeve pattern, and it looks much better now for sure!

Photo Aug 14, 1 22 40 PM (1)

Another change I made to the dress sleeves is to make them adjustable. The Disney version has buttons under the arms to allow for the different arm sizes of the “friends” that wear the dress. I decided to sew on snaps instead of the buttons, but the snaps  give me room for my arms to grow and keep the sleeves nice and tight against my arms. My thought is that the tightness of the arm bands will help support the poof of the sleeve. If my arms grow or I decide it’s too tight, I can just re-position the snaps.

My petticoat has consumed my entire cosplay life for almost two weeks! Granted it has been on and off work, but it’s the only cosplay item I’ve been working on lately. Instead of using tulle for my petticoat as some Alice cosplayers have, I decided to make one using many layers of circle skirts. I have nothing against those who use tulle/net petticoats, I just personally don’t care for the way the tulle looks when it pokes out of the bottom of the skirt. The Disney park Alice’s petticoat is layers of circle skirts. The only problem with circle skirts is that the hems on them take forever. When I first started cutting out my circles, I cut a piece of fabric too small on accident, so I used it to make 2 half-length skirts. I was able to cut 3 full size 28″ long circle skirts out of the rest of my fabric.

I have greatly admired fellow cosplayer Roxie’s Alice cosplay, and she is the one I actually bought my wig from. She hemmed her petticoat circles with horsehair braid which helped give some volume to her hems. I loved the way the bottom of her circles draped, so in place of hemming with horsehair (which can get to be quite expensive!), I decided to fold my hem over 3 times. Yes, 3. It took me a week to get 3 of those skirts finished.

I attached the first petticoat skirt I finished hemming to my waistband right away because I was so excited. Unfortunately, I didn’t think it through very well and when I tried to attach the second skirt to the waistband, I realized I needed to add the layers on differently. So an hour later, I managed to pull the waistband free of the two skirts. Sewing takes so much patience it’s ridiculous. But nothing is ruined, so we’re all good there. Just showed some more love to my seam ripper, as if it didn’t get enough love already.

My petticoat with 2 half size circles and 3 full size. They’re just pinned on for this picture, so the final length will be a little shorter. My top is my Her Universe Stormtrooper dress. :)

I have plenty of fullness in the bottom of my petticoat, but not enough in the top. I hemmed my two half-length skirts and pinned those on with the other 3 layers just to see how it looked. It definitely added some fullness to the middle, but I still need more at the top. I’m going to add a little bit of tulle in the top half of my petticoat just to round out the top so that the fullness isn’t all at the bottom. I also need to make at least one or two circle skirts out of this sheer material I bought to help keep the dress skirt from sticking to the petticoat. More work and hemming, but the poof will be worth it in the end!

The lace isn’t actually crooked . . . the picture just makes it look that way. :)


I did finally start my “real” bloomers. I made some mock-up ones first (naturally . . . I’m so slow) just because I am modifying a store-bought pattern and wanted to make sure the pattern would work the way I wanted. The mock-ups were such a mess where I tried to attach the “lace” (a piece of fabric that I scalloped the edge of) to the bottom of the legs. I didn’t think it through well at all and rushed it. It was so bad. Other than that, they turned out ok. :) So after reconfiguring how I attached the lace to the bottom of my real ones, I started working. I nearly finished one side before I ran out of thread and had to stop, but the lace is looking so pretty on the bottom! It pays off to think things through! The pattern called for flat-felled seams down the inside of the legs, but that type of seam is so tricky on my machine, so they ended up messy, and were completely unnecessary (it’s an undergarment for pete’s sake). I left those seams off my real ones. I hope to finish my bloomers really soon once I put my new thread in the machine. :)

Well more updates to come, but I have plenty of work to do with school just around the corner!

Always keep dreaming!

Taria

Alice Cosplay Update 1

I mentioned in my introductory post that I am working on an Alice in Wonderland cosplay, so in this post I’m hoping to show you what has been completed thus far!

I am an extreme amateur in the world of cosplay and sewing in general. Alice will mark my first completed screen accurate cosplay!  People ask me all the time where I learned to sew, and the best answer I can give is that I kinda taught myself. My mom helped me make a skirt with a pattern once, but that’s all the assistance I’ve ever really had. Most of the things I’ve made are from written instructions or I’ve made it up as I’ve gone along. To me, sewing just makes sense in the way that it works. My seam ripper is my best friend, and I make mistakes all the time! I’ve sewn many things crooked or just plain wrong, but the nice thing is that you can usually rip it out (if you have the patience).

Sometimes I look at the Alice mess around me and think, “What on earth am I doing? I don’t have the skills for this!” Then the words of Walt Disney come to mind where he said, “All our dreams can come true if we only have the courage to pursue them.” I tell you all this so that you know that if I can do it, so can you!

Ok, so I say “Alice in Wonderland,” but what Alice am I doing exactly? I’m recreating the Alice as seen in the Disney parks. The Disney park Alice differs slightly from the animated movie version, but I like the park version much better! The style of it looks much cuter to me. The style of the pinafore (apron) is slightly different, and the collar and arm bands are white instead of blue. These deviations from the movie used to drive me crazy, but I’ve grown to love the way the park version looks!

As to my current progress on my Alice costume, it’s coming together . . . slowly! I have purchased all my materials, so I shouldn’t have to buy anything else! I’ve been plotting this costume since the beginning of June, but good things come to those who wait, right?

Photo Aug 05, 3 38 34 PM

The skirt won’t be this short, but I made the entire prototype out of a bed sheet, so it could only be so long. :)

I’m a very paranoid seamstress (perhaps because of my lack of experience), so I like making prototypes of everything. To make the costume as accurate as possible, a few modifications from the original patterns are necessary. I have made prototypes for my dress, bloomers, and pinafore, but all have proved useful! I tried to leave some room to let out seams in the dress, but I ended up making it too big! The sleeves from the pattern are too puffy, so need to modify those some too.  I made my own pattern for the pinafore, so the prototype helped greatly in figuring out what I need to change before I make the final version. I have cut out my final bodice and will work on that this coming week! Updates to come. :)

20130725-111132.jpg20130725-110932.jpg

         I III I I I I I I I I I I i i i i i i i i I i i i i i i i i i i i

I have already purchased my wig and shoes, and they’re so perfect! I only hope that my costume will be worthy of the wig and shoes! :)

I will continue to update you as my costume progresses, but that’s all I have for now!

Taria

“Do everything you do to the glory of the One who made you because he made you to do every little thing that you do to bring a smile to His face and tell the story of grace with every move that you make.”

Stephen Curtis Chapman “Do Everything”